I've been a bit lazy in updating this blog for the last few weeks. Thankfully this has not meant an absence of activity in the workshop plus I've had a number of non-work related things going on to distract me. I'm looking forward to next year when I'm fully focused on making things and reduce external noise. Anyway, enough excuses...
I finished off the giant ruler I was making for my niece. It looked great she was very happy, next year I'll look to add these as a product (when I get organised to sell things). I still have to photograph it finished and installed but you can see it being sprayed with lacquer below. Next to that is an experiment I cut as a new sign for my house, I wanted to look at making a wooden house sign with a more modern look to it. I like the texture and layout but might need to think about altering the design for more easy finishing. Finally on the top row of photos is a simple plywood box I made to cover a fuse box. I had forgotten how pleasing it is to cut pieces that just slot together to make a perfect joint.
The next set of pictures shows a window that I'm collaborating on with the other guys in the workshop. I've designed the carved cherub and feathers to echo an old carving that is displayed in the room this is going into. The backside of the window is more simple with just the quatrefoils. Hopefully we'll get to assembling this and installing in the next week or two.
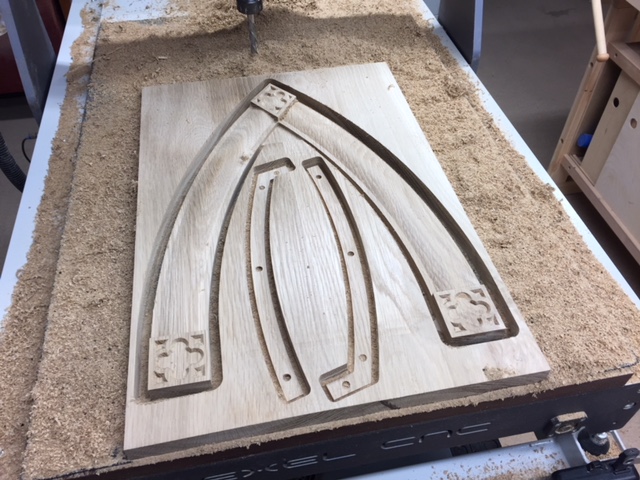
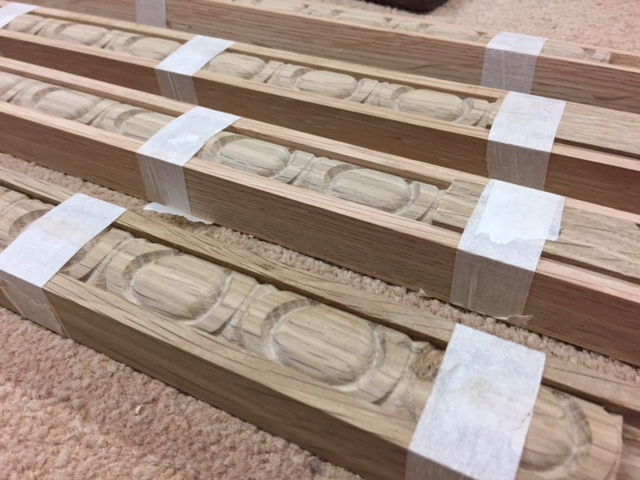
Lastly the very ornate mantel that I've been writing about since July and working on for even longer is, I am pleased to say, finished and installed. The last 8 weeks have been spent intermittently working on building up all the pieces to make the main horizontal mantel block and the columns as finished assemblies. In addition, as the finished mantel also required doors we decided to accent these with the same egg and dart on the mantel. So I needed to cut some flat lengths of these to incorporate into the frame. You can see these below.
After some handwork to finish the carving and joints the main parts of the mantel were ready for spraying as you can see below. Then it was assembled and taken over to the customers to install. You can see it being lifted into place in the images. As is typically the case there was then quite a bit of adjustment to get it to fit straight and true into an uneven space. Thankfully the guys at Thomas Philpott cabinet makers who I share the workshop with took care of this which was fascinating to watch. Finally it slotted into place with the surrounding woodwork completed to blend it in with the already beautiful work that those guys have done in this room. The customer is very happy as am I and they'll be a lot more photos added to the Gallery soon, to document this very challenging but rewarding project.