I’ve made a poor effort with writing my journal this year although I have been quite busy, so here is a bumper update with the first three months highlights from the workshop.
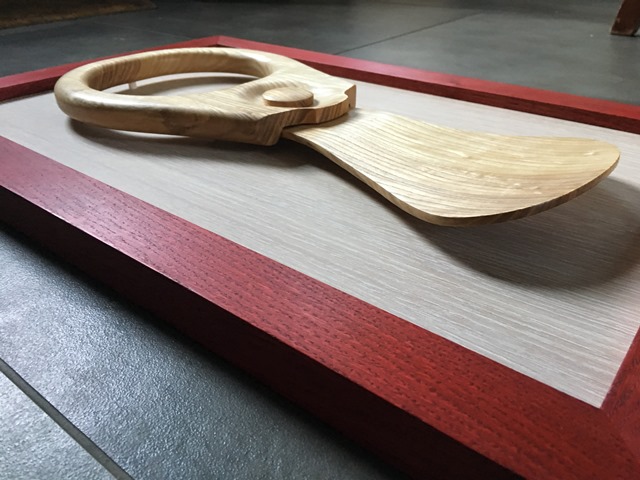
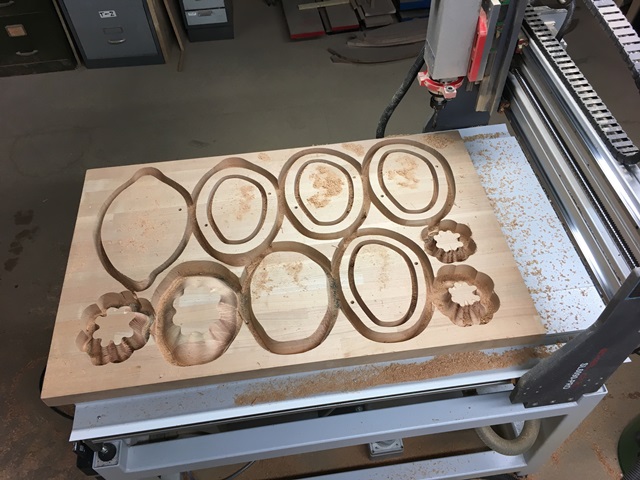
I’m pleased to now be working with a gallery in the Cotswolds to show some of my artwork and bowls. One of these pieces is an oversized ash wood ring-pull (old style from when they used to come off completely) mounted on limed oak veneered MDF and framed with red-stained oak. This piece is entitled “Pop Art No.1.” - it plays around with the idea of the original pop art movement to elevate mundane objects and put them in unfamiliar context. The wood and size of the piece jars with expectations and it appears to float above the background. Below in the images you can see the parts being cut and then a couple of different angles of the finished piece which creates great depth with shadows.
Another piece is my interpretation of the shape created when starlings flock, this incredible visual spectacle is known as a murmuration. The forms and movement created by the undulating mass of birds is mesmerising. Murmuration No.1 is a solid black walnut carving cut from both sides and finished with Danish oil to enhance the grain pattern and allow it to interact with the changes in shape. I sculpted the main form in the software and carved this on the CNC before significant hand-finishing to accentuate the curves and get it as smooth as possible.
As well as the wall art I’ve also been making more bowls and finishing some of my older designs which are also being shown in the gallery. You can see see a selection of them in the first image below. The second and third image show some of the quicker jobs I’ve been doing in the workshop for the guys I share the space with. I make a lot of these square pyramid screw hole covers shown in the middle image, these ones are oak into walnut. I also often make fluted columns and the pyramids to decorate the top of them as shown in the third image below - this is partially finished limed oak.
Occasionally I like to try and make something for myself. Below is my interpretation of the cover of the King Crimson album, “In the court of the Crimson King”. This is one of my favourite album covers of all time, the original is based on a painting by Barry Godber that represents the Schizoid Man. It captures human angst in a way that really resonates with me, that seems just as apt in today’s world as it was 50 years ago when it was released.
I used this to test an idea I had about framing a deep carving in the same way a raised panel door is constructed. In this case I machined the maple for the main carving so it had a lip on it. The sapele frame was then made on the spindle moulder in the workshop with an angle on the top along with a rebate for the lip to locate into. Below you can see the maple being carved, then the frame being glued on to the carving and finally the finished oiled piece. I am really pleased with how the frame seems to be trapping the face to add even more drama and the angle on the top along with the corners leads your eyes into the middle. This assembly method holds the carving really well and keeps everything from curving.
The images below show a work in progress entitled “Bag of Sand”. This is an exploration to help me explore what gives a piece of art value, is it the idea, technical skill, craftsmanship, context, materials or is down to marketing and recognition. This is part of an ongoing set of work I’m creating with a working title of “Finding Truth in Absurdity”.
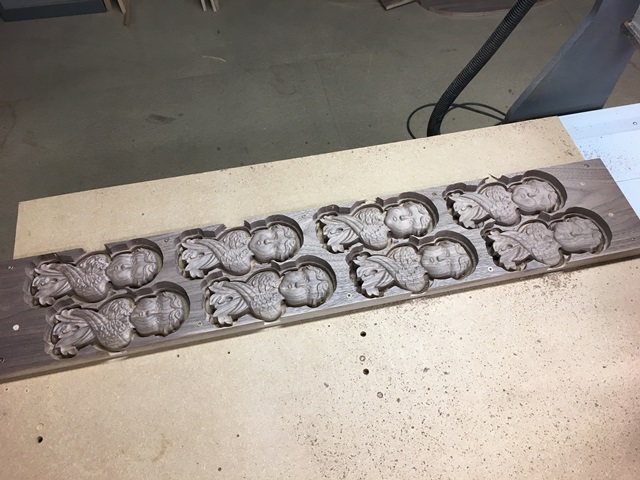
As well as my own work and the smaller jobs for the guys in the workshop I’ve also been working on some interesting client commissions this year. One of our customers is very interesting in carved cherubs and has a few 17th century examples that he wants to use in other work around his house. I spent quite a lot of time trying to capture the likeness of a pair of the carvings he already owns and went through 6 iterations before I was happy with them. You can see some of this work in the first row of photos below, in the middle one you can see the original cherubs (outer) in comparison with my third iteration (inner). Once I’d finally perfected the design, the first actual use was to edit it to create a version to add decoration to some wardrobe doors previously made by Thomas Philpott (who I share the workshop with). I had to flatten the features to fit into 22mm thickness and rebate the back so they would lay over the existing woodwork. You can see how these turned out in the second row of photos which shows them installed on a few of the doors.
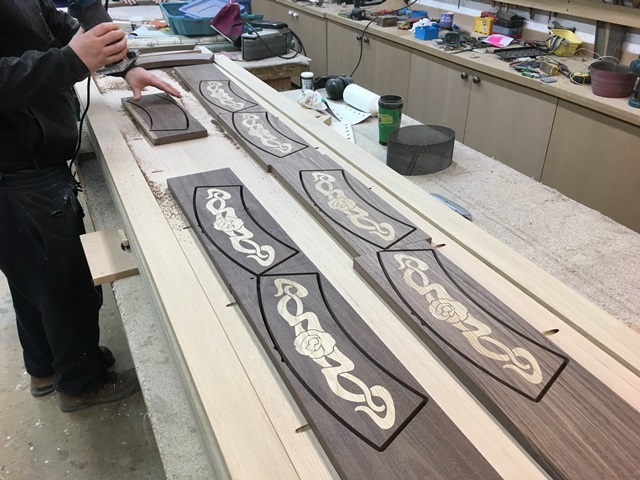
For another client we’ve had an interesting variety of things to design and build for their house renovation. One of these was to create a decorative ring to surround a hole that goes from the ground floor to cellar. Guidance for this was the suggestion of roses and art-nouveau.. I designed a motif that we could cut into one eighth of the circle, creating the v-inlay of oak into walnut and then the guys could assemble and install these pieces into the full circle mounting it onto a lip that will hold a piece of glass to cover the hole.
Another project for this client was a book-case and decorative interior panel to go under the stairs. The decorative panel needed to contain glass and suggest a banister shape that would then be echoed on the wall behind it, with the steps leading down to the cellar. Tom and I collaborated on a design that would soften the sharpness of the stairs with some fluid curves and included some very large pieces of walnut to create an amazing end to the banister shape. Below you can see the progress of cutting the large piece of walnut (two sides to rebate the back to attach to the frame). The first picture on the second row of photos shows the oak frame components, which I also cut on the CNC, being assembled. These had some interesting butterfly joints and rebates cut into them for the glass. For such a big piece where I had to cut almost everything in multiple setups on the machine it went together really well. In the last image on the second row you can see the finished bookshelf and the decorative panel just after installation.
The banister for the cellar steps was made to echo the shape on the decorative panel, this needed to curve out from the wall and then come up at the bottom with a similar shaped end. The supports needed to look like stylised tree branches and also accommodate lights that were already installed in the wall. It was intended that it would be painted so it was made with poplar, subsequently the client decided that he wanted the banister dark to match the walnut, but not stained, so Tom had the good idea to have it upholstered with textured brown leather which looks and feels amazing. Here you can see some close-ups of it in the workshop waiting to go for installation.
The same client is also an artist and commissioned us to make a frame for 11 of his painting that would slot together like a jigsaw. This is still a work in progress but you can see the pieces as I carved them on the CNC and slotted together waiting for assembly, priming and painting. This is 4m x 2m - so is going to need a big wall to be displayed on…
Finally for this entry some parts that I cut in October last year we’re finished and installed this week. I’d carved 120+ arched pieces that had a 4mm wide walnut bead glued into the centre and then were cut to size using a jig I made to ensure the four corners would be correct to assemble them onto the side of the 6m long beams to make arches. In the top row of the photos below you can see this jig in action. This worked really well to quickly size all these parts and get nice sharp corners onto them for easy assembly. The picture at the start of the second row shows all the egg and dart I’d machined assembled into a moulding and then the final two images show the installed beams, including the base piece that i had also carved last year. The client was very happy with all the work we’ve done for him so far. Next we’re going to be finally getting to his kitchen which is going in the same room as the beams and should be equally as striking.


