The last 6 weeks have been fairly quiet in the workshop but I’ve still been ticking over with carving parts for clients and also used the spare time to start experimenting with some new ideas and techniques.
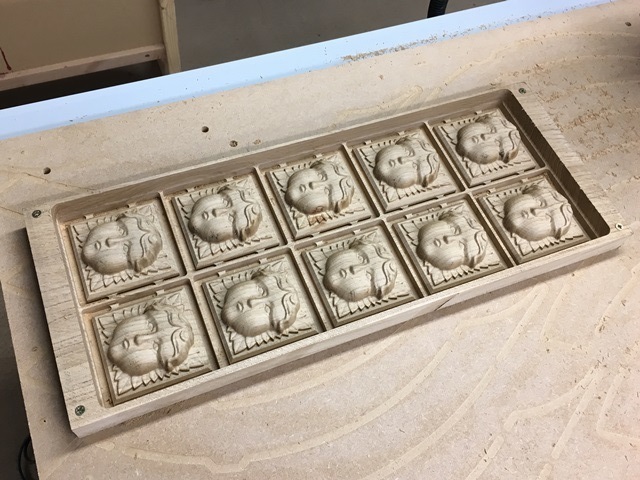
One thing I have been continuing to make are the Cherubs faces that are going to be installed in a clients library. Below you can see some of these in progress and the finished parts filling the third photo. In total there were 82 to make, suffice to say I’d seen enough of them by the time they were all cut and sanded…


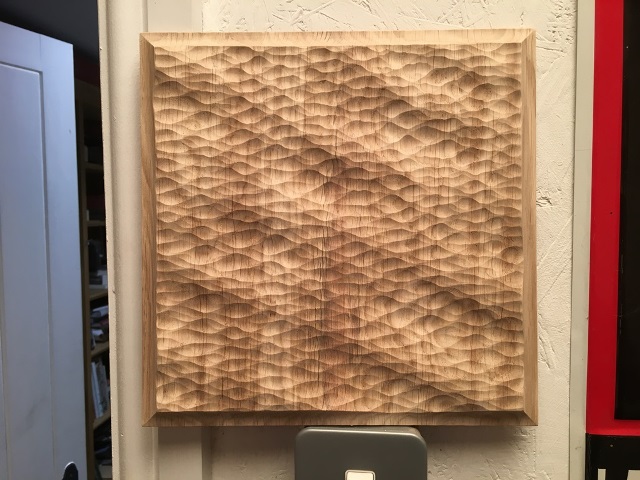
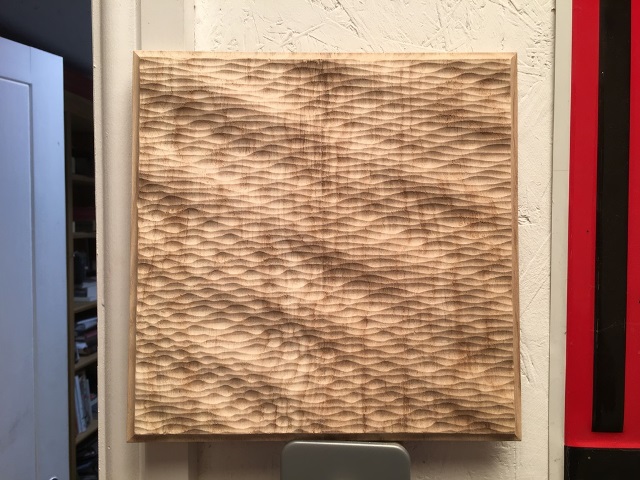
We’re getting ever closer to finishing up with another clients work and I carved a few more pieces for that in anticipation of a big August push to get all the individual pieces finished and installed. Below you can see some light pattresses in the first photo and then an extra large version of the quilted walnut panels that we’ve made in the past to infill the posts in this clients kitchen. This wider version will be going over a door to complete the frame for the entryway. I’m really looking forward to this project being complete and the chance to get over to the house to take some final photos of all the eclectic mix of work we’ve done there.


One of the pieces of R&D I’ve been doing this month are some test cuts for textured door panels. The design for these is by my friend Joe Valasek in Oregon who has a business called Carveture making custom carved parts in the US. He had a client in the UK contact him about possibly doing some work for them so we’ve been running some tests and seeing how these might work if I were to make them. In the photos below you can see them being cut on the machine and the final panels (unsanded and unfinished). We’ll see whether this progresses into any work but its been interesting to work on and developing my own textured panel set is on my list of objectives for the year.

As a personal project I made myself a Chimp to go on my bedside table. This is based on the artwork from the book “The Chimp Paradox” by Prof. Steve Peters. I’ve found this book and the ideas in it extremely helpful to me in the last few years to help me calm my overactive brain and lead a more healthy and fulfilling life. The Chimp is designed as a daily reminder to keep up the good work. In terms of the object itself I used a thick Maple off-cut from a previous project, masked the face and then once it was cut I painted the areas I’d machined. When you peel the mask off it leaves nice clean lines for the paint and just needs some gentle sanding to finish. You can see the progress of the project in the photos below.


I’ve also been doing some R&D work to learn how to make a plaster cast from an original. For some clients who do not want finished parts in wood but who are looking for painted ornamental ceiling or wall decoration this will be a more efficient way to make detailed components than individually carving each one.
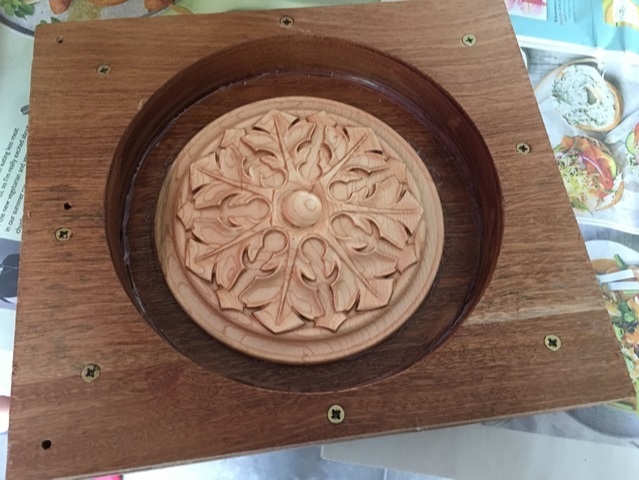
In this case I modelled a rosette and machined this using a very small tool to get a really good level of detail and finish on the part. You can see that in the first image below. This was lightly sanded and lacquered to give a good surface finish and ensure the mould material would not stick to the grain. I then cut a simple round shape to make the mould out of some scrap wood. The original was hot-glued into the mould - although in hindsight I should have been a bit more careful with this as there were some small gaps underneath it. I then put petroleum jelly around the edges of the mould to help with release once it was set. The 2-part silicon mould material was mixed and then poured over the master as you can see in the third and fourth photos below. I left this overnight to cure - then peeled it out. The original part did come with it as some of the material had got underneath, as you can see in the fifth photo, this was easy to remove though which left me with a good mould that I just needed to trim some of the flashing off. Finally I mixed some fine casting plaster and poured it into the mould leaving it for an hour to set before removing the finished part. In the final photo below you can see the original, the mould and cast piece all lined up. I was very pleased with the outcome and will continue my testing with some other designs to fully explore this new capability for the business.