There has been a lot of different things going through the workshop in the last couple of weeks. To start this journal entry though I’ve a few previously documented projects to show that have moved on a bit. Below you can see the rippled bowl, arched panels and one of the tattooed fists. The walnut bowl is finished and just needs to be photographed properly then delivered, I really like this variation with the ripples top and bottom and will be offering a very limited number for sale in future. The arched panels are primed and ready for final painting as can be seen in the second image. In addition both the tattooed fists have been installed on the clients stairs but still need a final sand and oil. The guys from Thomas Philpott Cabinet Makers did an amazing job installing them.
The images below show my latest prototype for another wooden bowl design. I had the idea for this shape when I was half-asleep one morning. This example was carved from some scrap Sapele. The finished bowl really is a lovely little object and will definitely see further development.
The three images below show some parts that will be used to line doorways in a clients house. The first images shows a hole being cut into walnut strips. These strips will have a molding shape cut into them and then the oak flower carvings shown in the second and third image will be inserted into these. Each doorway will have a different flower motif - 5 doorways, 8 flowers for each doorway. These intricate carvings had to be cut with a very small tapered ball nosed tool (1/16 inch tip) to get the detail.
In a similar vein the card suit carvings, cut in walnut, shown below also use a very small tool to get the detail. These are cut two sided with a 12mm circular plug on the back of them that will be inserted into holes to provide a decorative cover for screw locations.
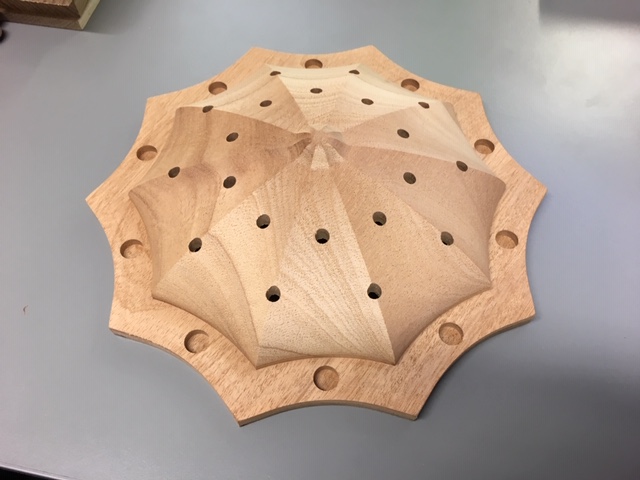
The ceiling rose shown below was created to house 20 wires that will be stretched around a room with ornamental bulbs on them. To help evenly space the wires we went for a 10 sided design with scalloped edges. This will be painted to match the ceiling colour. This was also a two-sided cut, carving the cavity on the back first then the domed shape after. I also carved some small walnut plugs that will go in the screw holes around the edge once its painted.
The scalloped fan shape you can see in the images below looks relatively simple but its size pushed the CNC and tooling to the limit. The finished part is 100mm high - given I only have 150mm gantry height this meant having to be very careful with positioning of the tool and making sure the tool collet would not collide with the part when cutting. MY safe distance that the tool travels above the part when cutting was only 1.5mm over the surface. As you can see from the images it came out well and the final photo shows it installed waiting to be painted.
The final job to document today is the largest v-inlay I’ve done. The customers wanted a Celtic weave design carved in oak and inlayed into a walnut step. I drew my interpretation of the design in the software I use (Vectric Aspire) as you can see rendered in the first image. I decided to make it in oak and inlay walnut into it, then cut this out and inlay the whole disk into the step as a separate piece. This approach was down to its large size and not being sure how well the inlay process would work at this size. In the images you can see the oak part with the cavity carved out and the walnut insert. I make these so there is a 1.5mm gap underneath for glue and a minimum of 5mm of depth to create the glue joint. The parts are glued and clamped overnight then its run through the planer to get down to the correct inlay depth. As you can see in the final two images this came out perfectly. I am really looking forward to it being installed and oiled as it should look incredible.


