Big Black Frames, Speaker Surrounds and Antique Cherubs

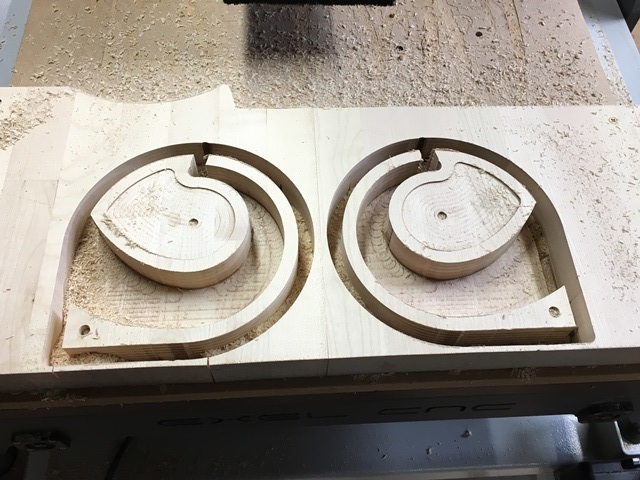
Now the big CNC is up and running it was almost back to normal this week in the workshop. I did have an opportunity to work on the new green machine cutting some Valchromat (a dense coloured MDF type material). I had to make some concentric shapes which will eventually become frames for an artist customer of ours. You can see these being cut in the first two pictures below. These went well apart from a small fire I managed to start in one of the holes due to heat build up from not being able to clear the chips. Lesson learned and minimal damage caused, for the rest I cut the holes with a smaller cutter spiralling into the hole to clear the debris (and heat). Another relatively quick job I did this week was a pair of rounded speaker frames for one of the other companies that has a workshop on the farm where we’re located. They specialise in VW restoration - particularly campers. The simple oval frame you can see in the third photo below will become one of a pair of frames around a 6 x 9 speaker for one of their current projects.

As any regular reader will expect to see, there has also been some more cherub activity this week. I’ve been working on trying to replicate an antique carving for one of our clients for a while. I have done previous simplified versions for some of the panels we’ve made but he wants to make a much larger version that will become and external sign on his house. So I wanted to try and really nail the face and also get each of the wings which are asymmetrical as close as possible to the original. The 17th century carving can be seen being held in the first picture below. The model I created based on photos of this is on the screen next to it. From this you can see the carving of a smaller scale maquette on the CNC in progress in the second photo and then complete in the third. I’m really pleased with how close this is to the original and can now work to create the much larger version for the client. I’m hoping next week I’ll get started on the Chimney Piece work but there is always plenty of potential for interesting distraction too.

Chimney Piece Design and the Big Green CNC

With the arrival of the big green CNC (more on that later), I have not actually made too much since the last post. I did go over to the house where some of my recent work has been installed and was able to take a (not very well lit) photo of one of the large cherubs in its place on the wall. You can see that in the first photo below. I have also been involved in quite a big design project for the same client. This is for a Chimney Piece (like a fireplace but more grand). The design is based on a drawing from a furniture design book dating from 1742. You can see this in the second photo below. I have taken the design and modified it to incorporate a number of cherub carvings and also some other decorative details. He has given us the go ahead to make two of these, one for each end of the room. So I have a lot of work to get on with modelling and machining all the new carvings and figuring out how we’re going to build all the other parts to mount them onto. Should be fun… You can see my final design in the third image below.

As regular readers will know, I share a workshop space with Thomas Philpott Cabinet Makers and much of my work is for their projects. Given some of the things we’ve got coming up this year Tom decided to stop trying to get me to figure out how to make parts on my small machine that are much bigger than it and instead to get a really big CNC to do that work. So he ordered a 3m x 1.5m (10’ x 5’) CNC Router. After a couple of weeks of rearranging the workshop, building new stairs and floors we were ready for it to arrive. It was quite exciting as we we’re responsible for getting all 1.6 Tons of it off the delivery truck and into the back of the workshop. As you can see in the pictures below it took a fair bit of effort but the BGB (Big Green Beast) eventually got into place. It was commissioned last Monday and we’ve been having fun cutting some test parts on it and getting to grips with its control software. Next I’ll have to teach the lads to use VCarve Pro and they’ll be able to make all the big (boring) stuff themselves. Leaving the fun carving to me and Igor (my small CNC).

Skirting, back-carving Cherubs and a Peacock Butterfly.

As I’ve stopped using social media now (moral reasons - its really not doing our world any good at all IMHO) I’m going to endeavour to update this Journal more regularly from now on, assuming I’ve actually done anything… This first entry covers the whole of January where there has been plenty going on but not too much actually made.

The majority of work this year (and plenty at the end of last year) is to decorate the interior of a large building, to keep some consistency I’ll refer to this in the Journal as No. 3. This project will have a lot of carvings and interesting classic details. Many of the doors I made panels for last year are for this and have started being installed as you can see in the first two images below. As you can see it’s still mostly a building site but I’m excited to see some of it being put into place. One thing I have cut this year for this room is to cut decorative holes into the skirting that will dress the bottom of the units. These were mostly different sizes so needed a lot files to machine them all. Once I’d prepped the computer data from the drawings, I made a jig to hold the parts in place so the shapes could be cut out. You can see the jig and a part being carved in the third image below and then the stack of skirting that I had to cut for the whole room. The jig made this job pretty straightforward, as is often the case good preparation and planning made the actual cutting go as efficiently as possible.

Another project for this room was some large Cherub carvings that will sit inside some panels for the passages between rooms. I’d carved some of these at the end of last year but we decided they would look better if they were also carved on the back to make them look hand carved. To do this I made a jig to hold the front of the carving in position, you can see this in the first picture below. Using this I was able to carve a model from the software to cut the edges of the back which you can see in the second photo. As well as the machine work I did a lot of hand carving too to cut in the overlapping pieces and sharpen up some of the details. This was time consuming but very effective. The third image shows the four finished parts. Notice there are two with left wing overlapping and two with right overlapping - as per the customers request. Small customisation like this and the hand carving really made these look good.

The final image below was a very beautiful Peacock butterfly that turned up in the workshop and nestled on the outside of our office wall. I don’t think it was very happy with the cold but brightened my day.

In other news, the Cabinet Maker I share a work-space with has decided to buy a much bigger CNC than I use, mainly for sheet work. So we’ve spent a fair bit of time this month pulling apart and putting together the workshop to fit the new piece of kit in. This meant moving most of the tools we already have along with building a new staircase and flooring so that has eaten up a fair chunk of time.

Finally for No. 3 we discussed with the client at the end of last week a design for two chimney pieces for each end of the room shown above. He was enthused about these so I’ve started the formal design work, they’ll be based on a design from a furniture catalogue from 1742 and will look amazing. More on those in future updates.

A plaque, pilasters, aerofoil, stiffmas trees, semicircle window, big cherubs, gold leaf, daggers and a new bowl...

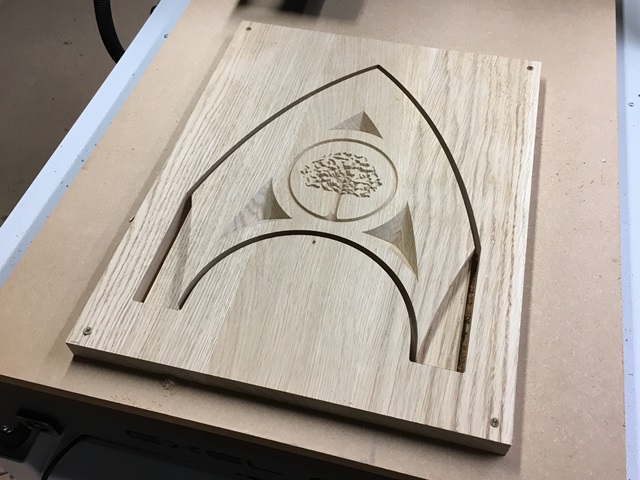
The workshop has been busy over the last couple of months. First up is Queen’s Award plaque I was commissioned to make based on the one I made for Vectric almost three years ago. The company, Saint Pierre Groupe, who are a large baked goods producer in the UK, asked me to make their plaque from walnut (which looks gorgeous). I had forgotten how effective this design is with the “e” standing proud of the main surface, it really worked nicely in the walnut too. You can see the plaque in the background of the second photo in this article covering the award presentation.

In terms of making it, below you can see the work in progress, the first photo is the back with the keyholes cut for hanging it. Then there are couple of photos of the “e” being machined. For the main plaque, before cutting the text I sealed the wood, sanded it smooth and applied a vinyl film. In the fourth photo this is being machined through to cut the text, then in the next image is the film being peeled off after painting leaving nice clean edges. Finally the plaque was finished with Briwax Danish Oil which I’ve just started using and really like its finish and application (but not its smell)… The customer was extremely happy with it when I delivered it to them.

The other main project that’s filled much of my time this month has been making fluted columns (pilasters) for the panelled room we’ve been working on. I had over 100 of these to make in different lengths. So I decided to use cam-clamps to hold the part in place as these hold firmly but allow easy release and re positioning. I cut my own cam clamps and used steel rod as their pivot. These worked really well. Below you can see one of the smaller columns in the first image, then a much longer one being held by the clamps in the second photo. A lot of these pilasters have one of the small square cherubs I’ve been carving inserted above the flutes. The third image shows a pocket for these inlays being cut and the final picture is some of the finished pilasters, including cherub, drying after being primed.

One of our clients is a burgeoning artist - Stiffy - he asked us to work on two projects which were both quite different. Firstly we were commissioned to make an unusual “frame” for a new piece he has in the works. This is kind of an aerofoil or wing shape (at least that’s how I thought of it). I cut the curved edge pieces for this and the inner braces, which were initially solid poplar. After seeing how heavy this would be he asked us to take some material out of the 45mm thick bracing. So I make a pattern of circles to cut out and used the cam-clamps again to hold each piece in place while it was being machined, again they worked a treat and I intend to use them a lot more to hold parts in place.

The second commission from Stiffy was to cut Christmas trees out of veneered MDF, each one with the artist signature engraved and painted. To do this we sealed the face of the veneer then I carved the signature and some registration holes as can be seen in the first image below. This was then sprayed black and the face sanded off to leave the signatures painted. Next I was able to use the registration holes to accurately re-mount the sheet on the machine and cut the holes and outer shapes of each tree as shown in the second and third image. After a bit of light sanding to clean up the edges you can see the finished trees in the last image. Subsequently I learned these were used to raise money for charity so congratulations to Stiff for that…

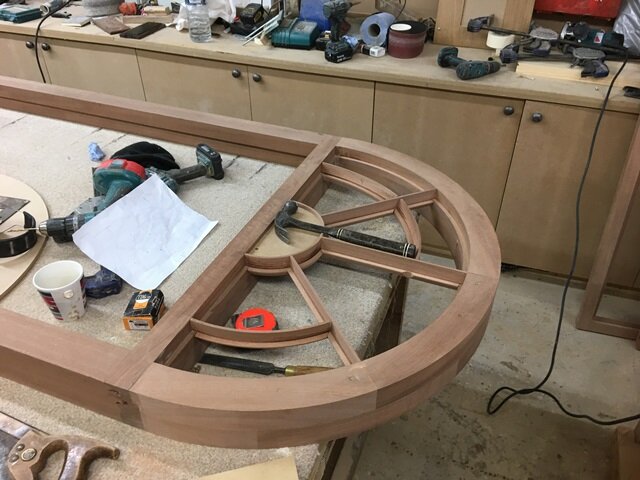
A more conventional project was to cut parts to make an arched window to go above a door that the guys in the workshop we’re making for another client. This was a really good examples of the benefits of CNC cut parts. The first thing I did was machine the pieces for the outer arch. As it was 95mm thick we decided to do it in two layers and create lapped joints as can be seen in the first two image, I also cut an MDF template for this to make sure it could be glued up accurately. The frame components were cut two-sided with a rebate for glass on one side and a bevelled top. I designed these to when cut the bevel would slot together and make clean joints. The third and fourth images show these parts having been cut and roughly laid out before they were put together. The fifth picture is an image of them being assembled using a template I cut for centre part of the window to help position them correctly. The guys in workshop were really happy with how it went together (I am always impressed by how good a job they do too). The beauty of cutting parts from the same drawing is I can then develop this to also cut the glass templates (image 6 below) and cut the beading for the glass (image 7). The final assembled window is shown in the last photo waiting to be primed and painted, simple but very elegant and satisfying to work on.

Cherubs continue to be a big part of my life and this month I cut the largest ones I’d made so far. These will go within frames in some large door liner panels. They are 1100mm x 150mm x 40mm so quite big! As they were too long for the machine I had to make them in two pieces, you can see the main parts being cut in the first two images and then two of the ends being carved in the third image. The final image shows both pieces, finish sanded and in position. I believe there will be more of these to carve in 2020 along with many other different cherubs for the same client.

Continuing the cherub theme the same client has indicated we may need to gold leaf some of the carvings when the final painting has been done. So I went through the process of gold-leafing one of our carved panels I made for his doors as an exercise to see how practical this will be. I first applied Gesso to prepare the wood (image 1), sanded this back and painted it gold to cover any small gaps my lack of gold-leafing skill might leave (image 2). To make sure it was sealed and ready for the gold-size I applied a coat of shellac (image 3) and then finally applied the size and several hours later the gold leaf. The last image shows this 90% complete with some clean up work still to do. I was reasonably happy with how it came out and we’ll show the finished version to the client to see what he thinks…

As normal this month I’ve cut some other more random jobs, some of which you can see below. The first image shows some MDF circles for the guys to use on the spindle moulder in the workshop as expendable guards. The second image shows a perspex panel I engraved for my friend who is converting his village’s red phone box into a place to keep a public defibrillator. The third image is a concept for wall-art design I was playing with, this is cut in black valchromat, a kind of dense MDF. It’ll be sealed, sanded back and then lacquered to finish it. It is a very effective and I’ll probably develop this more next year, my son has already claimed this one to go on his bedroom wall. The final image are a pair of letter openers, the design for obvious reason is called a Bollock Dagger, as absurd as it sounds if you follow the link you can see its a real thing. These are an unusual design and still work very well so I may develop this further as a product I can sell.

Finally this month, and for that matter this year, is a project I started in 2018. Tom, who I share the workshop with, had a piece of very dense wood (Cumaru we believe) that was from an old project and not being used. Last year I took some of this and cut a design into it which is like a whirl-pool or vortex. This came out well but with a solid square bottom it looked to blocky, then it sat gathering dust until I decided I really needed to get it finished. So earlier this month I decided to make it more of a bowl shape. This involved securing it to an MDF spoilboard with four blocks of wood and then carving a curved shape into the back - as shown in image 1 below. At this stage I was a lot happier with the shape (image 2) although there was still a lot of sanding to get all the toolmarks out and curve the sharp edges. The finished bowl is shown in the third image before oiling, then the final image shows it with a few coats of oil. This last image makes it look a bit more orange and shiny than it actually is. I was really happy with the final form and also how heavy this, even better though is how satisfyingly tactile it is to touch… I really should make more bowls again next year. Maybe even make more of an effort to try and sell them to other people too instead of just hoarding them myself…

That’s everything for this year, looking back I’ve worked on a massive variety of interesting things, so thanks to all those who commissioned work from me. I look forward to more of the same in 2020 and hopefully continuing to grow things from my compost heap of ideas.

Grand Canyon Table, Lattice, Octagon Handle, Cherubs, Arches, Horses and More...

First up is a project which I had briefly mentioned in the last entry. Our client wanted a kitchen table with a filled carving on the top and a doubly curved base (which is the part I’d mentioned in the last blog). For the top, rather than do a traditional “river” table with an epoxy fill we thought that carving something with some shape into the table top would be more interesting. I found a grayscale map of the Grand Canyon online and modified it to create the design you can see below. This had to be carved in two setups due to the length of the table. Once carved and sanded we were ready to pour the epoxy. Using a light blue tint this gave us a nice blue/green colour in the wood. Curing took 48 hours, then the top had a lot of sanding to get it glassy smooth. This was then attached to the base which you can see in the second to last picture and oiled for finish. The customer was very happy with the finished table which is shown in the last image.

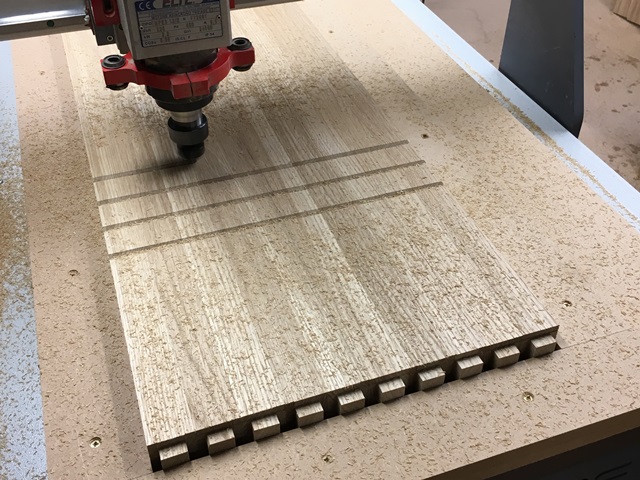
Also for this customer we were asked to make a lattice to go into the base of a deep shower. The staves for this were pre-cut to the right cross section then slabbed up on the CNC as if they were one board, clamping them together and then machining the joints into them with simple pocket toolpaths. In the first two photos below you can see the short and long staves being machined. Then in the third photo you can see them being assembled, with the finished lattice shown in the fourth image. This was made from Iroko as its naturally oily and so will last better in a moist environment.

The kitchen we have been working on for many months is now complete, I don’t have finished photos but was able to get over there and take some pictures while the guys were installing some of the final pieces. Below you can see the ceiling beam, entry door and some of the cabinet doors we made. Together it looks really striking and I hope to get some photos of the completed kitchen soon.

For the door the customer wanted a large handle to match some of the other features in the house. He decided to go for a red leather clad brass pipe with bold octagonal walnut tops and bottoms. I created the model and then carved the two pairs of walnut parts with a two-sided setup. You can see them being machined in the first image below, then the finished parts and in finally situated with the pipe section.

Switching gears now, as previously mentioned on this blog we have a customer who is very partial to cherubs. We’ve started some new work for him and so I’m back into carving different interpretations of some of the designs we’ve used previously in his house. These are all based on original carved cherubs that he already has as decoration. The first photo shows an arched door for a medicine cabinet, here I’ve adapted one of the cherub designs to fit the corner. The second photo shows heads on square blocks that will be applied to the top of posts dividing panelled doors in a large room. The third and fourth photos show a design which is going into the panels on these doors. There are at least 16 of these.

The frames for the doors have been made by hand but required me to make some pointed arch components for the top. These had to match the rebate for the glass and a profile on the front of the pieces that had already been built. I made a couple of prototypes to get to one that matched perfectly, then started making the 20+ sets we needed for the doors. In the first photo you can see multiples being cut. The second photo shows the back of the part that was cut two-sided. The last two photos show two of the doors with the pieces expertly assembled by Al in the workshop downstairs. These look really nice so my hats off to Tom who has designed the whole room and all the work Al did to bring the drawings to life. Its nice to be able to contribute a small part with the arches and carved panels. Good team effort.

As well as the client commissioned work I’ve also been pottering with my own stuff. One of these was an exercise to do what I am calling “extreme museum sketching”. Often you see people in museums making sketches from the exhibits and I’ve been know to do this myself. I thought it would be fun though to take it a stage further and attempt to model something I’d seen in a museum and carve my own version of it. The first picture below shows a clay sculpture of a horse that is in the Ashmolean Museum in Oxford. I took the photo into Vectric’s Aspire software and spent a few hours modelling my own virtual version based on this which you can see in the second image. I then carved two copies, one mirrored which can been see progressing in the third photo. Once done I glued these together and gave them a good sand as you can see in the fourth photo. I was quite pleased with how this looked and plan to try accenting the shape by staining and sanding the high spots to create dark areas within the creases of the model. More on that in the next blog entry (if I remember…)

Finally a section of a few random things that I’ve cut and finished in the last couple of months. In the first image is the wedding present box I’d made the front for. This has since been used successfully and now the front is a wall decoration for the happy couple. The second image shows some push-sticks I made for the guys in the workshop out some scraps of oak flooring. A good use for material that would otherwise be burned. The third image are the frames that were made from all the egg and dart lengths that I cut a few months ago. They’ll now have glass added and go into the fireplaces in the clients house to act as draught covers. The fourth image is a sign for a company who have moved into the Farm where our workshop is located. I made this for them as a sign for the business and to show off a bit what we can do as they may have some work for us in future… Always good to keep in with your neighbours.

The fifth image is a small army of Chimps I made. These are based on a graphic from “The Chimp Paradox” book which is great. I wanted to make one for myself and thought I’d make a batch while I was doing it. The sixth image are two prototype paperweights I made from Black Walnut filled with lead-shot. These are very tactile and rather pleasingly can also be used as a makeshift maraca… The seventh image is a half-hull Typhoon Class submarine model that I’ve machined for an art piece I have in the works. Finally the last photo are some prototype magnetic beer openers using the RAF roundel (Mod emblem) as a motif. These are still to be sanded and oiled. Once sanded the stain may need refreshing a little to complete them. That’s most of what’s been happening since the last update. More again toward the end of the year.

Kitchen Furniture, Wooden Handles, Wedding Signs and Passive Amplifiers.

Its been a kind of on-off month in the workshop with it being summer. Although looking at the photos below its been a reasonably productive August.

We’re still working our way through the last few pieces for a client we’ve been working with for the last year. Now focused on his kitchen the guys I share the workshop with needed to build a large bench and table. The bench was in the style of a church pew with an oak frame that continued the theme that we’ve had throughout with quilted walnut panels added for contrast. For the frame I collaborated with one of the guys who is an old school woodworker and made up a few of the pieces of curved joinery for him. I think he was suspicious to start with of whether I’d be any use but it worked out well. The parts he made by hand were spot-on to the pieces I cut on the CNC. In the first three photos below you can see some of the pieces of the frame I cut and them being assembled. The fourth photo shows some of the large walnut panels being quilted with a point-roundover tool on the CNC and then the rest of this group of photos show the finished bench, a door frame we made for the same room and also a chest that will also go in the kitchen. This design combination looks really good and matched well with the brass screens in the kitchen doors that you’ll see further down the page.

The table for this customer was an interesting design with a stepped base. I cut a set of MDF panels from Tom’s design that they could use on the router and spindle moulder to make the 20 levels that make up the base. You can see these in the first photo below, in the second photo you can see the finished table which looked great. Unfortunately the customer decided he did not want the stepped look and that he wanted it smoothed out, doh. So in the third picture you can see the corners being hand-ground off. As of typing this is still a work in progress - we’ll also be cutting a kind of valley shape in the top of the table and filling it with epoxy. More of that next month…

Below are a few other pieces from the same kitchen. The arched frame will tuck into an alcove with the chest from the first section of photos at its base. On these it was nice to cut both the decoration, shape and also some half-lap joints for accurate assembly. The second set of three photos show the final finished version of the kitchen cabinet doors that have been a work in progress for months - here you can see the antiqued brass mesh in the background, this matches the quilted walnut panels really well. In the last photo you can also see the walnut trefoil added at the top of the lower arch part. These are really very beautiful now and have got to be some of the most ornate kitchen cabinet doors in existence…

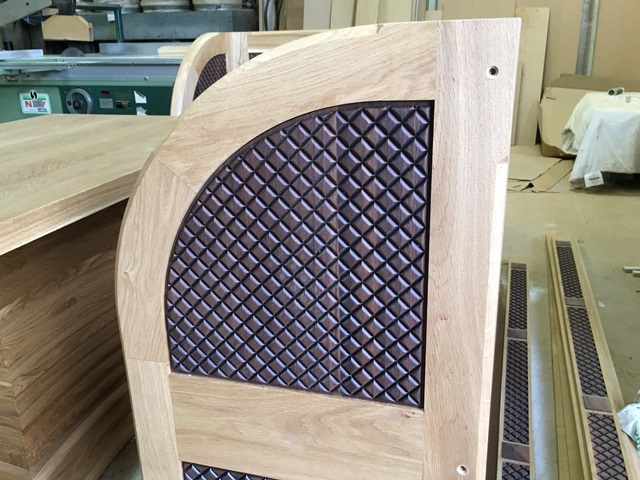
It was initially planned to order metal handles for the doors above that would have a pyramid texture. These proved to be extremely expensive though, so I was asked if I might be able to make something similar in walnut. This was an interesting challenge as the texture is on 3 sides of a square cross-section. After a bit of playing around I decided to carve the sides of the handles with standard 2-sided machining then use the “legs” to position it for machining the top side. This last step required me to carve rectangles into a sheet of MDF on the table and inserting them, then zeroing of the top face and machining the third set of pyramids. In the first three photos below you can see each side being machined in the same order they were cut in. Once I’d perfected the prototype (this took three goes with customer input on design). It was time to start production - the final two photos show a set of nine handles being machined from one side and then the tops being cut. I have some longer versions to make next week to create the complete set. I was very happy with how these turned out. They’ll need to have threaded sleeves glued into the legs for installation, plus a reasonable amount of sanding still to go…

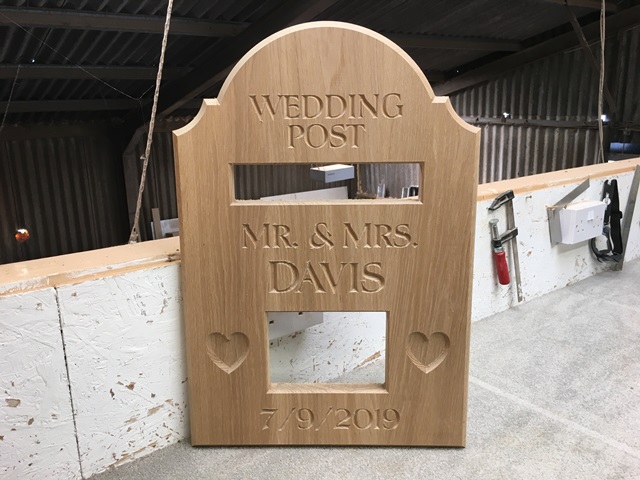
Finally, I had a couple of personal projects this month, in the first photo you can see a wedding post-box front I made for one of the guys in the workshop. Working to their design this was pretty straightforward v-carve and cutouts. The second and third images show a passive amplifier I made for my phone - this is a prototype but worked very well. I’ll tweak the design a little though and aim to make a finished version soon.

Cherubs, Textures, a Chimp and a Plaster Cast Test

The last 6 weeks have been fairly quiet in the workshop but I’ve still been ticking over with carving parts for clients and also used the spare time to start experimenting with some new ideas and techniques.

One thing I have been continuing to make are the Cherubs faces that are going to be installed in a clients library. Below you can see some of these in progress and the finished parts filling the third photo. In total there were 82 to make, suffice to say I’d seen enough of them by the time they were all cut and sanded…

We’re getting ever closer to finishing up with another clients work and I carved a few more pieces for that in anticipation of a big August push to get all the individual pieces finished and installed. Below you can see some light pattresses in the first photo and then an extra large version of the quilted walnut panels that we’ve made in the past to infill the posts in this clients kitchen. This wider version will be going over a door to complete the frame for the entryway. I’m really looking forward to this project being complete and the chance to get over to the house to take some final photos of all the eclectic mix of work we’ve done there.

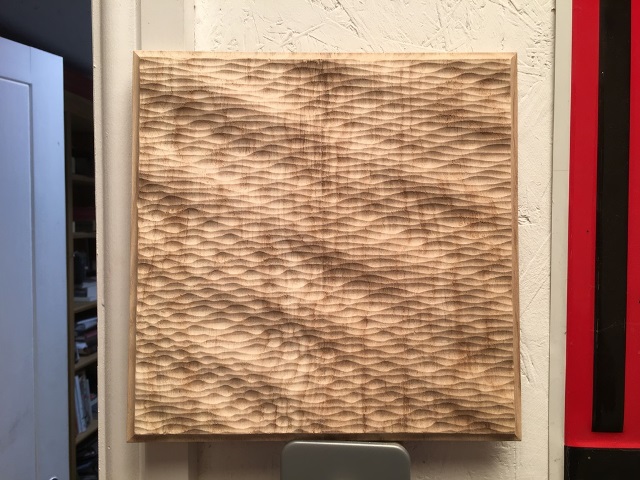
One of the pieces of R&D I’ve been doing this month are some test cuts for textured door panels. The design for these is by my friend Joe Valasek in Oregon who has a business called Carveture making custom carved parts in the US. He had a client in the UK contact him about possibly doing some work for them so we’ve been running some tests and seeing how these might work if I were to make them. In the photos below you can see them being cut on the machine and the final panels (unsanded and unfinished). We’ll see whether this progresses into any work but its been interesting to work on and developing my own textured panel set is on my list of objectives for the year.

As a personal project I made myself a Chimp to go on my bedside table. This is based on the artwork from the book “The Chimp Paradox” by Prof. Steve Peters. I’ve found this book and the ideas in it extremely helpful to me in the last few years to help me calm my overactive brain and lead a more healthy and fulfilling life. The Chimp is designed as a daily reminder to keep up the good work. In terms of the object itself I used a thick Maple off-cut from a previous project, masked the face and then once it was cut I painted the areas I’d machined. When you peel the mask off it leaves nice clean lines for the paint and just needs some gentle sanding to finish. You can see the progress of the project in the photos below.

I’ve also been doing some R&D work to learn how to make a plaster cast from an original. For some clients who do not want finished parts in wood but who are looking for painted ornamental ceiling or wall decoration this will be a more efficient way to make detailed components than individually carving each one.

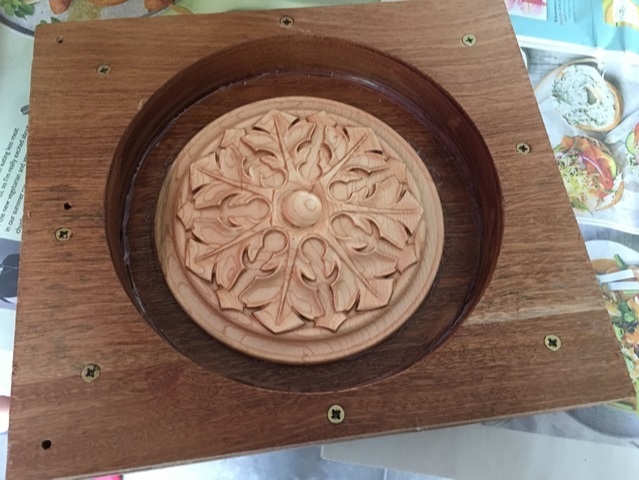
In this case I modelled a rosette and machined this using a very small tool to get a really good level of detail and finish on the part. You can see that in the first image below. This was lightly sanded and lacquered to give a good surface finish and ensure the mould material would not stick to the grain. I then cut a simple round shape to make the mould out of some scrap wood. The original was hot-glued into the mould - although in hindsight I should have been a bit more careful with this as there were some small gaps underneath it. I then put petroleum jelly around the edges of the mould to help with release once it was set. The 2-part silicon mould material was mixed and then poured over the master as you can see in the third and fourth photos below. I left this overnight to cure - then peeled it out. The original part did come with it as some of the material had got underneath, as you can see in the fifth photo, this was easy to remove though which left me with a good mould that I just needed to trim some of the flashing off. Finally I mixed some fine casting plaster and poured it into the mould leaving it for an hour to set before removing the finished part. In the final photo below you can see the original, the mould and cast piece all lined up. I was very pleased with the outcome and will continue my testing with some other designs to fully explore this new capability for the business.

Sacks, Chests, Jigsaw Frames, Kitchen Cabinets, Stair Carvings, Cherubs, my work continues to be varied...

Much has been going on both in the workshop and out of it for the last couple of months. Lots of good collaboration with the guys at Thomas Philpott Cabinet Makers (https://thomasphilpott.co.uk/) who I share the workshop with and some interesting work of my own.

First up is a project for my daughters bedroom, she asked me to make a set of plywood shelves to go in the corner of her room, next to an existing set of shelves. I decided to make these as a set of boxes that would stack on top of each other, both to create an interesting non-uniform layout and so that I could still fit the pieces I needed to cut on my machine. In the three pictures below you can see how these were cut, assembled and then finally situated and in use. The parts for these were cut out of two standard sizes sheets of 12mm plywood.

Something I referenced in my last update is a sculpture I’m currently working on. This has moved on slowly but surely with a lot of hand-shaping as you can see in the first two images below and many hours of hand-sanding to get it to a beautifully smooth finish. I have now started to french polish this and will add a rope around its neck to complete it hopefully in the next week.

One of Tom’s clients asked him to make some chests to go onto their barge, he asked me to carve a shallow curve into the top of these. Below you can see in the images that I cut these both out of single quite large (for the CNC) piece of glued up Sapele. In the last image you can see them with a single coat of oil (and some settled dust) waiting for subsequent coats of finish.

Another job previously referenced in this journal was a set of jig-saw puzzle frames, made for an artist to create a unique way to show their work. These were cut from 25mm MDF and then sealed and sprayed to give a smooth white finish. You can see these individually and then assembled in the images below.

Last year I cut a number of pieces for a Gothic inspired kitchen we’re collaborating on, these then had to be stored away as the client wanted a number of others things doing for his house and the kitchen to be done last. I’m please to say we’re finally back to working on the kitchen, so I’ve been pulling out the previously cut parts and trying to remember how I made things and how they were intended to be put together. The first of these were the pillars you can see below. These are 80mm square section solid white oak with walnut inlays for the quilted sections and the shallow pyramids. For some of these I had to cut a side inlay as well as the front, you can see in the second image below the delicate operation to do this that requires 3 setups due to the length of the components. In the last image you can see how good these look finished and with a coat of oil. I’m really looking forward to seeing the whole kitchen installed.

The cabinet doors shown below are another part of the same kitchen. These are quite complex assemblies with 6 CNC cut parts and then a number of other components to finish them. The part I most like on these is an overlapping arch, to make the design work I designed a nice joint to allow them to slot together and still have the decorative grooves running through them to house a walnut bead. In the first 6 pictures below you can see how these were cut, how they go together and then the initial assembly. The way this joint worked with minimal hand fitting was extremely satisfying, especially as I designed these months ago and had to rely on the fact I’d done it correctly… In the last 3 pictures in the block below, you can see the parts for the lower section of the interior of the doors and single and double door partly assembled. The moulding in this part of the door will also have a walnut trefoil shape added at its point then everything in the frame will be backed with a brass mesh to complete it. They are going to look amazing.

The guys have also started work on a major renovation for another client. The first part of this that I got involved with were the stairs. For the newel posts and spindles Tom wanted 90 degree v-grooves cut on all four sides. The newels would have been unwieldy to get on the CNC machine to setup accurately and to also support them, so I made an MDF jig that could be used to hand-route these into each side. You can see this in use and the result of this operation in the first 3 images below. The pointed end of the newel was shaped with hand tools not on the CNC. The second three image below show the spindles. These were done on the CNC using an MDF jig with a stop to line them up and a piece to clamp 10 spindles at a time in place. Once secure I cut straight grooves across them,released them, rotated each 90 degrees and repeated. This worked really well with a set of ten taking around 40 minutes to cut.

Another part of the same staircase were some carvings to replicate a piece of decoration from an existing set of stairs in the same building. In the first picture below you can see the original at the top and my first test carving. Once we were happy with how that looked I made edits to the layout so that for each of the stair treads we had a coherent design based on the original that fitted its length, rather than just have it short or chop it short. This is a real benefit of using CAD/CAM to make something bespoke, that the model can be adjusted and re-worked before carving. In the rest of the images in the block below you can see the carvings being finished, assembled and oiled on the already built stair components. These have been installed now and I’ll look to get a photo for my next update.

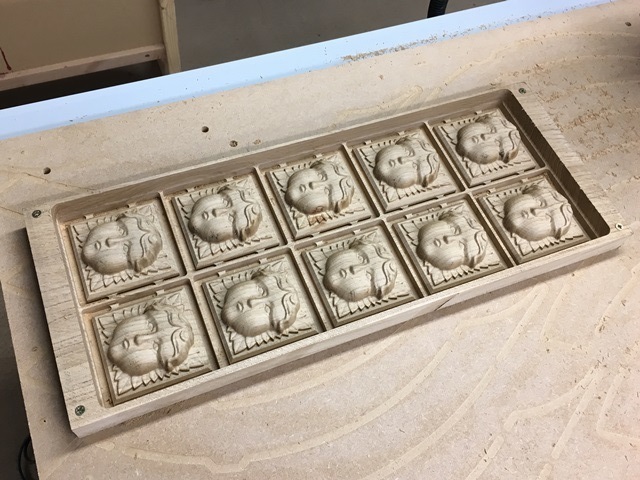
In my last update I showed images of some decoration we’d created using a cherub head, again based on an existing carving. This is now being re-purposed to add decoration to some square blocks in the library Tom previously built for the client. To make the head fit the square shape and make sense I created a feather pattern and added a chamfered edge. Below you can see the two prototypes being cut and the results with a single coat of oil in context sat on a block the size of the ones they’ll be attached to.

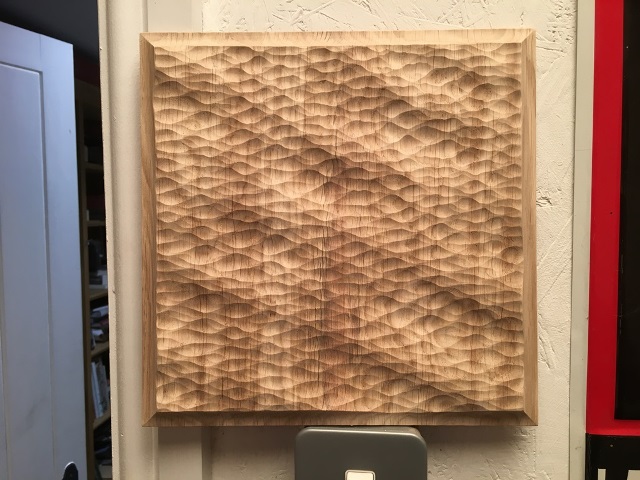
Finally for this workshop update a few random items that do not really group together that I’ve made within the last couple of months. The first image is an Iroko sign for one of Tom’s customers. The second image are two of around twelve panels I made to match existing ones that decorate the window frames on the front of a clients house. The third image is 20m of Egg & Dart moulding stacked up in bundles that will become door frames for the interior of a customers fireplaces at some point in the future. The fourth image is a really nice texture cut with a 1” ballnose that will be the centre of a table (topped with glass). The fifth is the platform number from Harry Potter cut in stone coloured Corian and painted for my daughter. Lastly is a small carving I made as a gift for the incredible illustrator Chris Riddell (https://chrisriddellblog.tumblr.com/) who we saw at the Hay Literary Festival last month. This is based on his own image of himself from the Art Matters book he illustrated, I love this book and use it to reset my mental state when I start to mistakenly think I want a normal job again… Until next time.