All the things I've made so far in 2019...

I’ve made a poor effort with writing my journal this year although I have been quite busy, so here is a bumper update with the first three months highlights from the workshop.

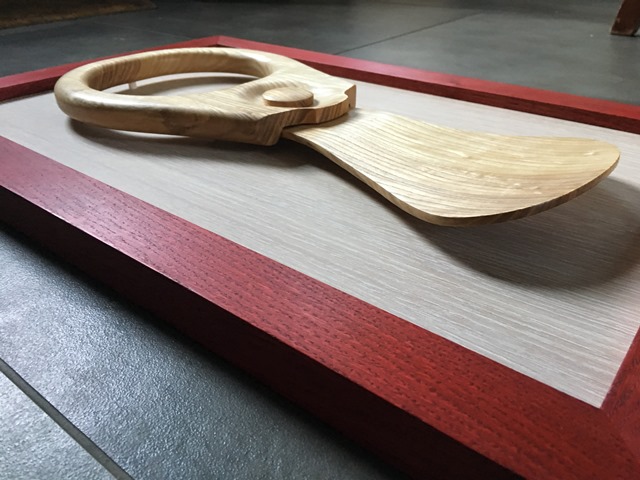
I’m pleased to now be working with a gallery in the Cotswolds to show some of my artwork and bowls. One of these pieces is an oversized ash wood ring-pull (old style from when they used to come off completely) mounted on limed oak veneered MDF and framed with red-stained oak. This piece is entitled “Pop Art No.1.” - it plays around with the idea of the original pop art movement to elevate mundane objects and put them in unfamiliar context. The wood and size of the piece jars with expectations and it appears to float above the background. Below in the images you can see the parts being cut and then a couple of different angles of the finished piece which creates great depth with shadows.

Another piece is my interpretation of the shape created when starlings flock, this incredible visual spectacle is known as a murmuration. The forms and movement created by the undulating mass of birds is mesmerising. Murmuration No.1 is a solid black walnut carving cut from both sides and finished with Danish oil to enhance the grain pattern and allow it to interact with the changes in shape. I sculpted the main form in the software and carved this on the CNC before significant hand-finishing to accentuate the curves and get it as smooth as possible.

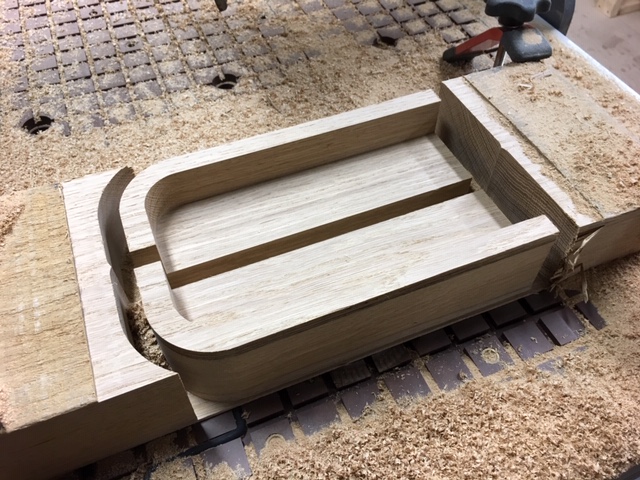
As well as the wall art I’ve also been making more bowls and finishing some of my older designs which are also being shown in the gallery. You can see see a selection of them in the first image below. The second and third image show some of the quicker jobs I’ve been doing in the workshop for the guys I share the space with. I make a lot of these square pyramid screw hole covers shown in the middle image, these ones are oak into walnut. I also often make fluted columns and the pyramids to decorate the top of them as shown in the third image below - this is partially finished limed oak.

Occasionally I like to try and make something for myself. Below is my interpretation of the cover of the King Crimson album, “In the court of the Crimson King”. This is one of my favourite album covers of all time, the original is based on a painting by Barry Godber that represents the Schizoid Man. It captures human angst in a way that really resonates with me, that seems just as apt in today’s world as it was 50 years ago when it was released.

I used this to test an idea I had about framing a deep carving in the same way a raised panel door is constructed. In this case I machined the maple for the main carving so it had a lip on it. The sapele frame was then made on the spindle moulder in the workshop with an angle on the top along with a rebate for the lip to locate into. Below you can see the maple being carved, then the frame being glued on to the carving and finally the finished oiled piece. I am really pleased with how the frame seems to be trapping the face to add even more drama and the angle on the top along with the corners leads your eyes into the middle. This assembly method holds the carving really well and keeps everything from curving.

The images below show a work in progress entitled “Bag of Sand”. This is an exploration to help me explore what gives a piece of art value, is it the idea, technical skill, craftsmanship, context, materials or is down to marketing and recognition. This is part of an ongoing set of work I’m creating with a working title of “Finding Truth in Absurdity”.

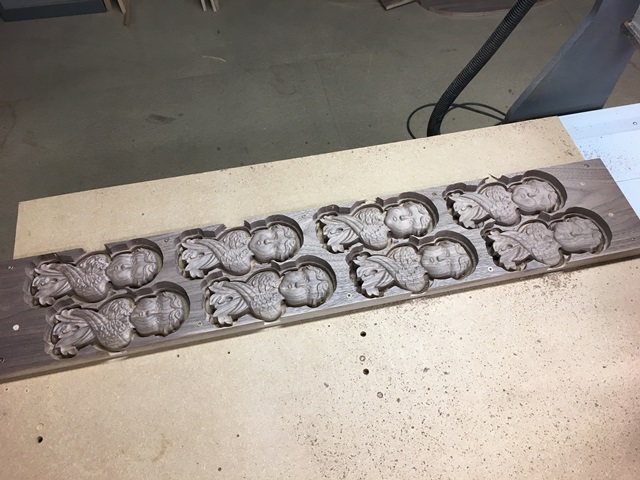
As well as my own work and the smaller jobs for the guys in the workshop I’ve also been working on some interesting client commissions this year. One of our customers is very interesting in carved cherubs and has a few 17th century examples that he wants to use in other work around his house. I spent quite a lot of time trying to capture the likeness of a pair of the carvings he already owns and went through 6 iterations before I was happy with them. You can see some of this work in the first row of photos below, in the middle one you can see the original cherubs (outer) in comparison with my third iteration (inner). Once I’d finally perfected the design, the first actual use was to edit it to create a version to add decoration to some wardrobe doors previously made by Thomas Philpott (who I share the workshop with). I had to flatten the features to fit into 22mm thickness and rebate the back so they would lay over the existing woodwork. You can see how these turned out in the second row of photos which shows them installed on a few of the doors.

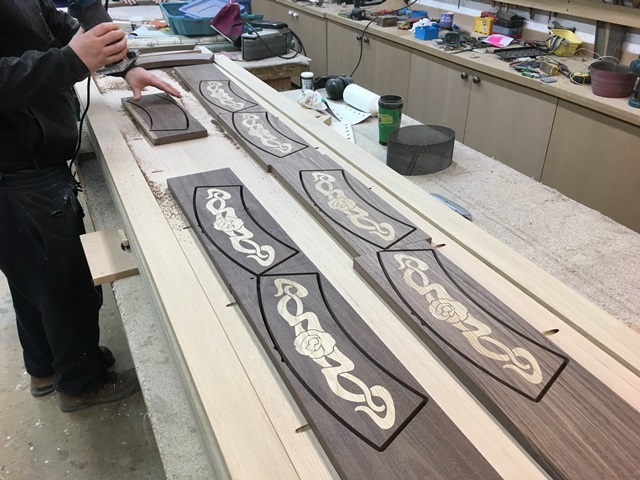
For another client we’ve had an interesting variety of things to design and build for their house renovation. One of these was to create a decorative ring to surround a hole that goes from the ground floor to cellar. Guidance for this was the suggestion of roses and art-nouveau.. I designed a motif that we could cut into one eighth of the circle, creating the v-inlay of oak into walnut and then the guys could assemble and install these pieces into the full circle mounting it onto a lip that will hold a piece of glass to cover the hole.

Another project for this client was a book-case and decorative interior panel to go under the stairs. The decorative panel needed to contain glass and suggest a banister shape that would then be echoed on the wall behind it, with the steps leading down to the cellar. Tom and I collaborated on a design that would soften the sharpness of the stairs with some fluid curves and included some very large pieces of walnut to create an amazing end to the banister shape. Below you can see the progress of cutting the large piece of walnut (two sides to rebate the back to attach to the frame). The first picture on the second row of photos shows the oak frame components, which I also cut on the CNC, being assembled. These had some interesting butterfly joints and rebates cut into them for the glass. For such a big piece where I had to cut almost everything in multiple setups on the machine it went together really well. In the last image on the second row you can see the finished bookshelf and the decorative panel just after installation.

The banister for the cellar steps was made to echo the shape on the decorative panel, this needed to curve out from the wall and then come up at the bottom with a similar shaped end. The supports needed to look like stylised tree branches and also accommodate lights that were already installed in the wall. It was intended that it would be painted so it was made with poplar, subsequently the client decided that he wanted the banister dark to match the walnut, but not stained, so Tom had the good idea to have it upholstered with textured brown leather which looks and feels amazing. Here you can see some close-ups of it in the workshop waiting to go for installation.

The same client is also an artist and commissioned us to make a frame for 11 of his painting that would slot together like a jigsaw. This is still a work in progress but you can see the pieces as I carved them on the CNC and slotted together waiting for assembly, priming and painting. This is 4m x 2m - so is going to need a big wall to be displayed on…

Finally for this entry some parts that I cut in October last year we’re finished and installed this week. I’d carved 120+ arched pieces that had a 4mm wide walnut bead glued into the centre and then were cut to size using a jig I made to ensure the four corners would be correct to assemble them onto the side of the 6m long beams to make arches. In the top row of the photos below you can see this jig in action. This worked really well to quickly size all these parts and get nice sharp corners onto them for easy assembly. The picture at the start of the second row shows all the egg and dart I’d machined assembled into a moulding and then the final two images show the installed beams, including the base piece that i had also carved last year. The client was very happy with all the work we’ve done for him so far. Next we’re going to be finally getting to his kitchen which is going in the same room as the beams and should be equally as striking.

A lot more flower lights, some door embellishment and more wooden bowls.

Its been a relatively quiet few weeks in the workshop but I have been working on a few interesting things…

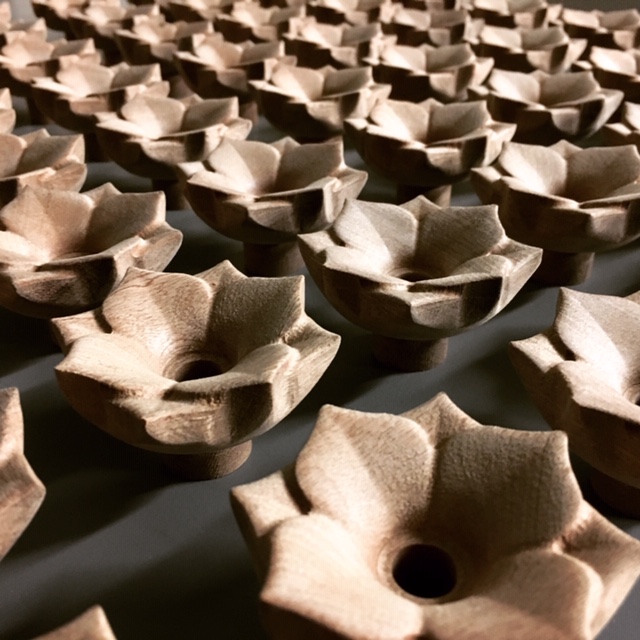
In the last blog entry I discussed a prototype I made for a ceiling light in the shape of a flower. The client was happy with the design so I went ahead and made 56 of them. You can see the photos of them in progress below with the backs being cut first then the front with the flower shape. The next two photos show them as they were being sanded and the fifth image shows the first few being installed into the decorative ceiling. I’ll try to get a better photo when they are completed. The final image in the set below has four views of a much larger version that I was also asked to make that will hold the sensor to automatically switch these lights on when someone comes into the room.

The guys who I share the workshop with had a job to take some doors they previously made for a client and add decorative beading to them. In addition they wanted to incorporate some small embellishments to add decoration. They asked me to cut some small winglets and pyramids that they could apply to the doors in contrasting woods. You can see these in the walnut they were cut from in the first two images below and then a shot of the doors themselves with the parts sitting in place. For such small pieces they really added to what are already very interesting doors.

In the last post I showed some new versions of my “Pear Chair” bowl that I’d made. Below you can see one of these with the oil applied. With all the curves it really shows the grain very nicely, even in this Sapele. I also have included a photo of a pear resting comfortably in the bowl for scale.

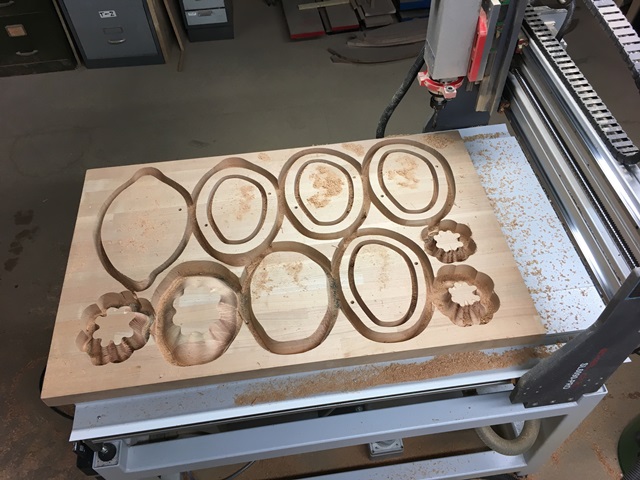
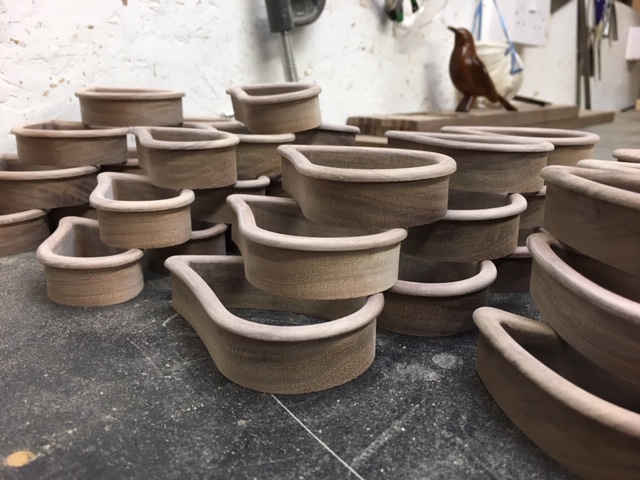
Continuing on the bowl theme I made a new set of prototype designs for some other ideas. These were cut into Ash as I thought the shapes would work really well with the strong contrasting grain of the wood. There are three very different designs. The smooth one is intended to resemble a bean, the polygonal one was inspired by some Japanese vases that I saw and the third is a sculpted whirlpool type shape. Each of these has produced something interesting and as always provided me with more to contemplate. I really like the way the smooth one looks and feels and also the sculpted part of the whirlpool shape and how it intersects with the grain pattern. The polygonal one had elements that were pleasing but was a bit underwhelming overall and some aspects of the shape just didn’t feel quite right. To try to better highlight where the dish part starts I thought I would pyrograph an effect of black liquid dripping inside the rim. I am intrigued by how this has changed its look and will be exploring the use of pyrography more with future designs. I also believe once this is oiled it will look very effective. Below in the first three images you can see all threel being cut on the CNC, the back first then material flipped over to cut the front. The second set of images shows them mostly sanded but not yet oiled, the light is placed to show the shape of each bowl more clearly. In the new year I will be continuing to explore what it is possible to do with wooden bowl shape and texture. Until then I wish anyone reading this a restful holiday and positive 2019.

Bits & Pieces, Flower Lights, New Iterations, Tardis Tiles, A Pear Chair and an Ash Stool.

From unconventional wooden bowls to my interpretation of a wooden stool I’ve covered a lot of ground again in the workshop in the last two weeks.

If your a regular reader of this journal you’ll know I’ve been making a selection of eclectic pieces for a client of the guys I share the workshop with (Thomas Philpott Cabinet Makers). I was at the clients house this week to take some measurements and took the opportunity to snap a few pictures. Below you can see (in order) the large walnut/oak Celtic knot inlay, the ceiling rose for the 20 light cords I made, the card-suit screw hole plugs and then three photos of the door stop flower carvings. The last photo in this group also shows a large walnut peg which goes between the skirting and the door frame that I carved. Not all of this is finished but it was interesting to see most things in place. The client is happy too which is good…

The same client has an arched hall ceiling which has a grid of moulding across it that requires a small light within each square. I was tasked with making something that would hold the LED light, had the shape of a flower and curved away from the ceiling. Below you can see the prototype for this. Its about 60mm across the petals (just over 2.25”) and 35mm deep (approx 1.5”). There are a couple of things to tweak if I this is approved and I do end up making the 55 that would be required to fill the space…

I’ve also been continuing to develop products for sale and experiment with my own ideas in the last fortnight. Below in the first three pictures you can see the latest incarnation of the standard magnetic beer cap catcher. This is cut in Ash wood. I used mask to help minimise the sanding required after the paint. You can also see I used my new logo branding iron to mark the backs.

In the fourth image you can see a new iteration of my magnetic key-holder. I changed the shape to an octogon and switched back to maple as the oak one I experimented with did not show the rippled shape well.

The fifth picture shows some prototype meat carving boards. In each of these the grooves are sloped to allow juices to run down into the circular well. This can then be poured off for making sauce etc. These turned out well and I now need to oil them and test them all to see which works best and also decide on my favourite designs. These heavily used the 2D toolpaths and fluting to achieve the slopes and carve the wells.

Lastly in this section you can see a project I did to experiment with some repeating tiles. The design for these closely resembles the walls in the current Tardis from the new TV series of Dr. Who. They did take a while to machine but look very effective and I learned a lot as their design is quite tricky to model and machine.

Another of my own projects I’ve been developing further is something I originally called the pot-belly bowl, after I posted a picture of it on Twitter a reply from @Scottran means I’m now dubbing it the “Pear Chair - A single fruit bowl”- thanks for the suggestion…

You can see from the first image why it was given this name. I love the shape of this but wanted to make it a bit bigger (perhaps to accommodate a pineapple or banana), shape-wise I also wanted to slope the corners down. These also allowed me to try some different parameters for the machining to create a ridged finish on the bottom. I found a large chunk of scrap Sapele in the workshop that was perfect for cutting a new batch (it was a big piece of scrap). You can see the progression of this below, first cutting the backs with the legs, then the fronts. The fifth and sixth image show a close up of the most ridged version and then all four of them with a single coat of oil. I love the look and feel of these bowls and how unconventional they appear. They are almost impossibly thin and can easily bend and flex - although its not really advisable if you don’t want it to snap. This batch will be finished now and then they’ll go on sale. The original has been taken home.

Last thing in this update is a stool I made for my son to go with the desk I built for him. I saw a design on the Open Desk website in a blog post that I thought was a good design and would suit his needs. I did not follow their design but instead developed my own to suit and cut it in solid Ash for looks and also to give me enough depth to put a curve in the top for comfort. It went together perfectly after machining although I did manged to snap the ring when clamping for glue. As a clean break it was easy to repair invisibly but I would adjust the design to probably make it thicker for more strength if I made another. I deliberately curved all the corners on the joints both to make them easier to cut, less likely to tear-out when cutting and also as a design feature. I think this is a good idea for CNC jointed furniture. I was very pleased with the finished object, it is comfortable and my son is happy which is most crucial element of all…

Pot Belly Bowl, Flowers, Card Suits, Light Rose, Door Head Fan and Celtic Weave Inlay.

There has been a lot of different things going through the workshop in the last couple of weeks. To start this journal entry though I’ve a few previously documented projects to show that have moved on a bit. Below you can see the rippled bowl, arched panels and one of the tattooed fists. The walnut bowl is finished and just needs to be photographed properly then delivered, I really like this variation with the ripples top and bottom and will be offering a very limited number for sale in future. The arched panels are primed and ready for final painting as can be seen in the second image. In addition both the tattooed fists have been installed on the clients stairs but still need a final sand and oil. The guys from Thomas Philpott Cabinet Makers did an amazing job installing them.

The images below show my latest prototype for another wooden bowl design. I had the idea for this shape when I was half-asleep one morning. This example was carved from some scrap Sapele. The finished bowl really is a lovely little object and will definitely see further development.

The three images below show some parts that will be used to line doorways in a clients house. The first images shows a hole being cut into walnut strips. These strips will have a molding shape cut into them and then the oak flower carvings shown in the second and third image will be inserted into these. Each doorway will have a different flower motif - 5 doorways, 8 flowers for each doorway. These intricate carvings had to be cut with a very small tapered ball nosed tool (1/16 inch tip) to get the detail.

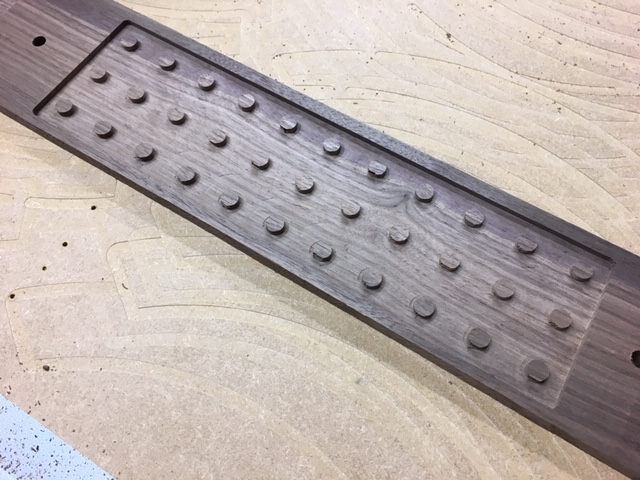
In a similar vein the card suit carvings, cut in walnut, shown below also use a very small tool to get the detail. These are cut two sided with a 12mm circular plug on the back of them that will be inserted into holes to provide a decorative cover for screw locations.

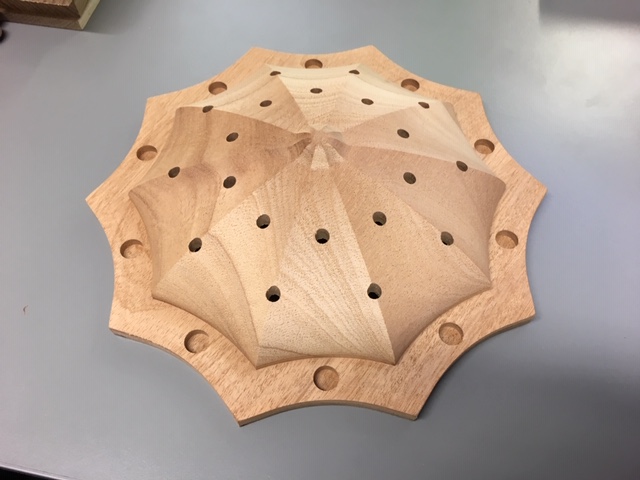
The ceiling rose shown below was created to house 20 wires that will be stretched around a room with ornamental bulbs on them. To help evenly space the wires we went for a 10 sided design with scalloped edges. This will be painted to match the ceiling colour. This was also a two-sided cut, carving the cavity on the back first then the domed shape after. I also carved some small walnut plugs that will go in the screw holes around the edge once its painted.

The scalloped fan shape you can see in the images below looks relatively simple but its size pushed the CNC and tooling to the limit. The finished part is 100mm high - given I only have 150mm gantry height this meant having to be very careful with positioning of the tool and making sure the tool collet would not collide with the part when cutting. MY safe distance that the tool travels above the part when cutting was only 1.5mm over the surface. As you can see from the images it came out well and the final photo shows it installed waiting to be painted.

The final job to document today is the largest v-inlay I’ve done. The customers wanted a Celtic weave design carved in oak and inlayed into a walnut step. I drew my interpretation of the design in the software I use (Vectric Aspire) as you can see rendered in the first image. I decided to make it in oak and inlay walnut into it, then cut this out and inlay the whole disk into the step as a separate piece. This approach was down to its large size and not being sure how well the inlay process would work at this size. In the images you can see the oak part with the cavity carved out and the walnut insert. I make these so there is a 1.5mm gap underneath for glue and a minimum of 5mm of depth to create the glue joint. The parts are glued and clamped overnight then its run through the planer to get down to the correct inlay depth. As you can see in the final two images this came out perfectly. I am really looking forward to it being installed and oiled as it should look incredible.

Arched Doorway, Fountains Abbey, Moulding, Light Covers, an Old Bowl etc.

It’s been a busy couple of weeks in and out of the workshop recently. A lot of work has been for a long term job I’m doing in collaboration with Thomas Philpott Cabinet Makers (the guys downstairs in the workshop) for a client who is completely remodelling their home with some very interesting and ornate features.

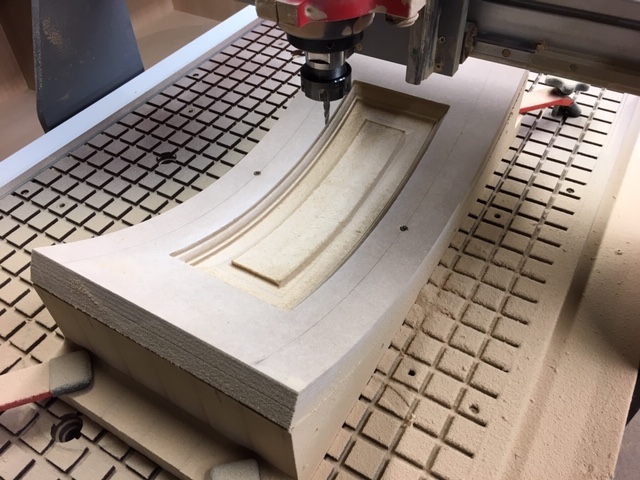
One recent set of components that were required for this was a set of panels to go on the underside of an arched doorway. We scratched our heads a bit about how to do these but in the end went for bending sheets of 3mm MDF into a curved glued form and machining the beaded, raised panel shape into these to match the rest of the panelling in the room which is being painted.

In the set of photos shown below you can see this process documented. The first few images show the forms used to curve the MDF and also to cradle it once curved on the CNC. The fourth image shows the MDF glued and in the vacuum bag to keep it in position overnight while the glue set. In the fifth image you can see the formed panel, which was sawn into three pieces. The cradle was then positioned onto the CNC and I machined out a precise curve to ensure everything would line up perfectly.

Each panel was screwed in place on the cradle and then the panel shape carved into it and the edges squared up. The finished parts can be seen in the last image, I also made a saw jig for these so they could be cut to length for installation. They have now been installed but I have not been able to get to the clients house yet to take a photo but will update when I can.

Last weekend we got away for the weekend to one of my favourite places in the UK; Fountains Abbey. Below you can see a photo of the ruin of the 12th century abbey - its location in a secluded valley is unusual for such a large building but just adds to the magic. Inside the ruin the light and shapes are amazing, we were particularly lucky to have a nice sunny autumn day to accent this as can be seen in the second image below. The last image is a carving that was on the wall in the more recent hall that was built near the ruin. It’s a very good carving, almost certainly Lime wood and in the style of Grinling Gibbons although not quite the same quality as the master, impressive nonetheless. Visiting places like this is one of the ways I get inspired and motivated to create my own work… If your in North Yorkshire its highly recommended.

The Moulding toolpath is a really good featured that was added to Vectric’s Aspire software about 2 years ago. It allows you to machine standard cross sections very efficiently. I’ve had need for it twice in the last two weeks. The first was to cut arched pieces of architrave to match the moulding being used, as seen in the first three pictures below. The second was to create a curved pieces of cornice to match another much deeper moulding (65mm). The process for both of these was to measure the original carefully using digital calipers, draw the profile in the software and then cut a 2D sample to compare to the original and make any small adjustments. Then you can literally extrude this shape to make a moulding toolpath to carve the shape. As you can see in the last photo you can get this pretty much perfect and they are also pretty efficient to cut too.

A while back I cut a prototype for a light cover for a client, they approved it but did not want all the parts cutting until the lights were ready for install. I got the go-ahead with these last week so went into production mode carving 10 of them at once - 2 sided. There was a bit of tear-out in the oak on a couple of them so I had to cut a couple more, adjusting the toolpath to minimise the chance for this to happen. These are waiting for final finish before install. The pictures below show them in process but not the complete set (I forgot to take a photo)…

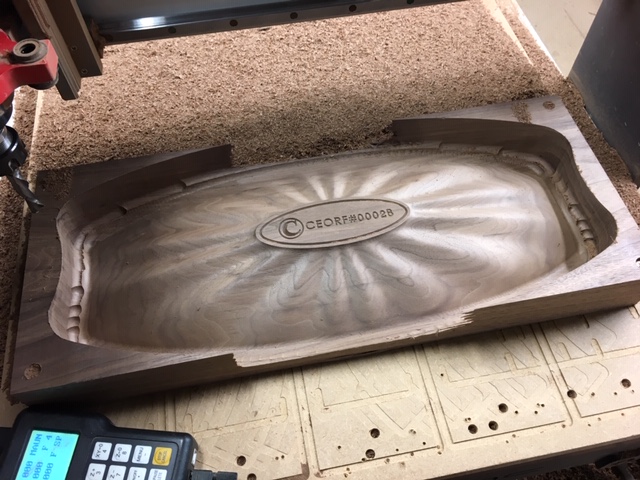
When I first started CeorfanWorks I made a bowl in Sapele with a rippled back. I really liked the design and had always intended to make a second version the original sits on the piano at home. A recent visitor saw the original and really liked it, he’s now commissioned me to make him one in Walnut. The thing I loved about the original was the rippled shape and how it interacts with the grain, the only problem is with it being on the underside its quite hidden - hence we have the original on the piano where its elevated. For this version I added some ripples to the top as well (although not as pronounced) which looks really good. Below you can see the process for cutting the bowl (two sided). This now needs sanding to eliminate all the tooling marks (although these are light I like to try and get rid of them all) and then I’ll oil it which should really make the grain pop.

Finally a few other quick jobs from the shop (it has been busy). I made some internal panels for a window frame I cut the parts for a few weeks ago (first image below). Another job was a couple of curved components which I don’t actually know the use of (I just draw them to spec and cut them…). The last image shows the result of my new branding iron I ordered which I can use to burn the logo into products rather than always carve it - the carving takes time and can be awkward to finish. I had a bit of trouble with heating it and making a good mark but with some practice I’m sure I’ll get good results.

Loose Ends, Decorative Beam Carvings and 2D Components

To finish up some business from the last blog entry you can see in the first picture below the fully painted Mayan Pyramid my son and I made for his school project. The teacher was very happy with it but more important we really had fun making it and I think he learned a few things (I know I did)…

The second image below shows some bought parts that let wires come up through a hole in a desk. The guys in the workshop had lost one of the tops so I made a new one (the one on the right) for them. Really nice to quickly be able to make a simple component without having to wait for it to be ordered.

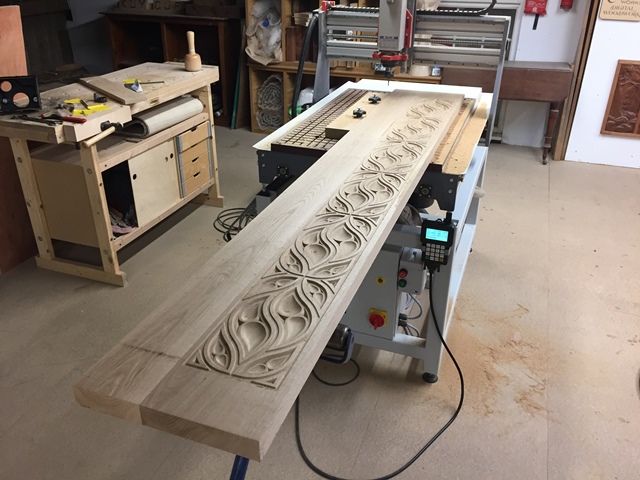
The third image on the top row shows a 2.4m (8 ft.) board, being carved by the CNC. To carve parts this long I have to pull them through the 900mm bed carefully locating them to ensure they are straight and indexed in the right place. I have good method for this now using a jig to keep it straight and a known tool position to locate its length correctly. The design shown in the image uses a combination of V-Carving toolpaths with a flat bottom pocket and also the fluting toolpath for the swept shapes in between - this is relatively quick to machine but still take a while when you need 6 metres of it. To secure this under the beam where it will be installed I cut 10 mm holes for the screw to sit within. To cover these I carved some decorative square-domed walnut plugs which you can see in the second row of photos. The first one shows the back with the 10 mm circle that will insert into the hole. Once this side is cut then are flipped over, aligned accurately using dowels and the top dome shape carved with a small ball-nosed tool. I left tabs to hold them in place and then trimmed these off with a knife and sanded them clean on a disk sander. You can see the finished parts in the photo below with the metal ruler. These small accurate pieces are very satisfying to make and turn a negative (the screw hole) into a decorative positive addition to the design.

The beam that the long carving shown above is going onto the base of also has decorative sides. Running along the length will be arches. Each one is made from the components shown in the first three photos in block below. These will have a 4mm wide walnut bead glued into the centre and then be sawn using the MDF jigs you can see in the middle photo. These will go together make the joint to complete the arch.

The top part of the beam will include a decorative moulding that will have an egg and dart element inserted to it. A lot of this last week has been spent carving lengths of this as you can see in the bottom three images. These have to be indexed through and aligned as accurately as possible. You can normally see a slight witness line where they overlap but this is easily sanded out. I still have about 5 metres of this left to carve. Each metre takes about 3 hours to cut using a tool with a 1.5mm (1/16”) tip diameter to get the fine detail…

Finally the guys in the workshop needed some 2D parts cutting which they can make by hand but the CNC can do more accurately and quickly. The first of these was some dividers cut out of 15mm thick maple wood. These had to interlock to create the grid to go in the drawers. I used the T-Bone fillet option in the Vectric software to allow the joint to fit properly as you can see in the middle-top photo below. The final photo shows the parts waiting a finish sand and final assembly.

The last three images show some long MDF parts required for a small rise of stairs that had to fit round some existing newel posts at a customers house. Again I needed to index these through the machine as the boards were 1500mm long but everything came out well and the guys were very pleased with how easy these were to assemble. You can see the finished set of stairs waiting for install in the final image.

Tattooed Wooden Fists, Door Update, Samples, Plywood Desk and a Mayan Pyramid

Tattooed Fists

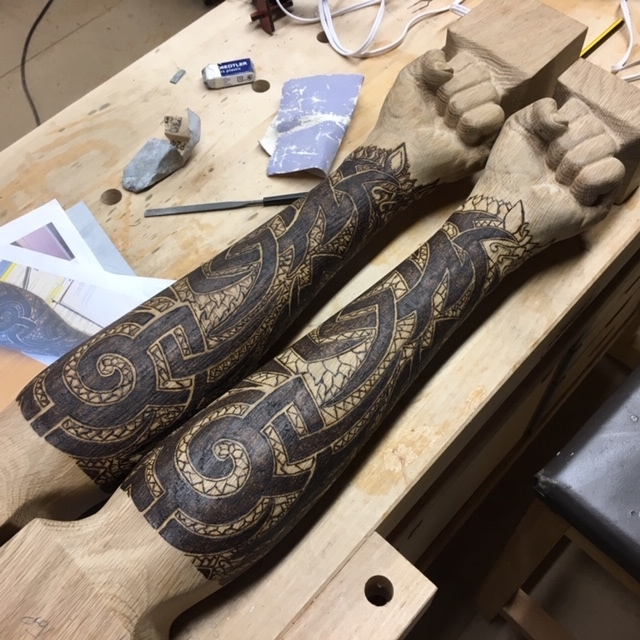
Out of necessity I’ve been learning how to tattoo for the last couple of weeks. In particular to transcribe the tattoo of my client onto the wooden arms/fists I made. This proved to be a challenge (to say the least). I started by drawing a couple of flat versions of the tattoo on paper based on the photos of the clients arm, this was to figure out how everything lined up as the tribal patter went around his arm and ultimately proved invaluable. Then I pencilled the design onto one of the arms. This again took a while and multiple erasings to get things spaced correctly and working right. Once the pencil version looked OK I started the pyrography. This uses pen with a heated metal nib to literally burn the design into the wood. If you make a mistake then you have to sand it off… so I proceeded to carefully outline the main black areas. Next I filled the solid areas and then added the outline and finally the detail. Once the first one was finished I used that to help me do the second so this was quicker but still time consuming (approx. 4/5 days to do all the work for both arms). The various stages can be seen in the images below. I was very happy with how these turned out and the finished result exceeded my expectations of how good this concept would look. The customer will be seeing them in person today, I hope he likes them as much as I do…

Door Update

The door I have been working on was put into its frame, sanded and a walnut inlay added around the inside of the rails and stiles. We also placed the walnut beads I made to hold the glass in place and put a coat of oil on it. This now just needs sanding back, more oil and the glass putting in place. The walnut really accents the panel well and I love the way the grain of the oak looks on the scalloped areas.

Samples

Below you can see a few random items I’ve been slotting in the past couple of weeks. The first is a new design for the magnetic key-holder. I like how this looks but don’t think the oak works for it so will probably stick to maple like the first one I built. The second image is a small sign I made to put next to my display at the Vectric User Group that I attended on Wednesday. It was good to see the new features going into the software and catch up with some old friends there. The final image is some egg and dart I modelled and machined based on a photo supplied by the customer. This was a machining test to see how it looked and time how long it takes to make so I can give him an accurate price on carving 12 metres of it!

Plywood Desk

My son needed a desk for his room. It had to fit over a box surrounding some pipes and also fulfil his wish list of having shelves, a tilted drawing board and looking “cool”… I volunteered to make it and ended up creating a design to use up some sheets of 12mm plywood I had in the workshop. Originally I designed it with plywood legs but a mistake on my behalf, running the same file twice instead of making the left and right meant I ran out of material (doh!). Some hasty design changes and adjustment meant I could still complete it without buying more material, but I did need to source some metal legs to add on instead. The whole thing took me about 50% longer than it should have to make as tends to be the case. This but does the job and most importantly the customer was very happy with it… You can see some of the parts being cut below (it all slotted together straight off the machine) and the desk with and without the drawing board in place…

Mayan Pyramid

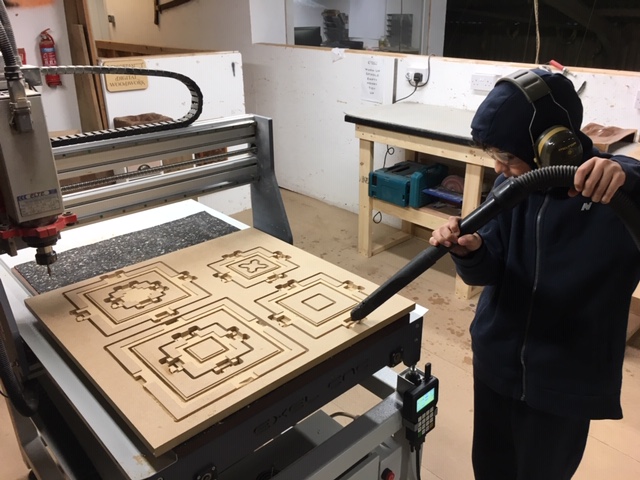
The last thing I worked on (literally this morning) was also for my son. His homework this week was to draw and describe a Mayan Temple - they also said if he wanted he could make a model of one too. I thought this would be a fun thing to work on together so I can show him the CAD/CAM process and something cutting on the CNC. We designed some files to cut into 18mm MDF that would stack up on each other to make the pyramid and also the steps going down each of the sides. You can see a willing helper vacuuming and sanding in the first two images and the finished pieces stacked up and glued in the third. Following this we scraped away the excess glue and put sanding sealer on it so it can be sanded back and painted tomorrow. It was really good fun and some “stealth” education to work on it together and we were both pretty pleased with how it turned out…

Modern Gothic, Poppy Window Frames, Beam Decoration and Fist Newel Posts

Apologies for the lack of a recent update. Starting with the World Cup, holidays and various other summer distractions I got out the habit of doing a weekly update. Going forward I’ll aim to add something every two weeks to make sure there is some good content but not to onerous to keep up with. On the plus side I have been quite busy with some interesting projects as detailed below. All these are for a particular client that Thomas Philpott Cabinet Makers (who I share workshop space with) are working with to create a unique interior space.

Modern Gothic Door

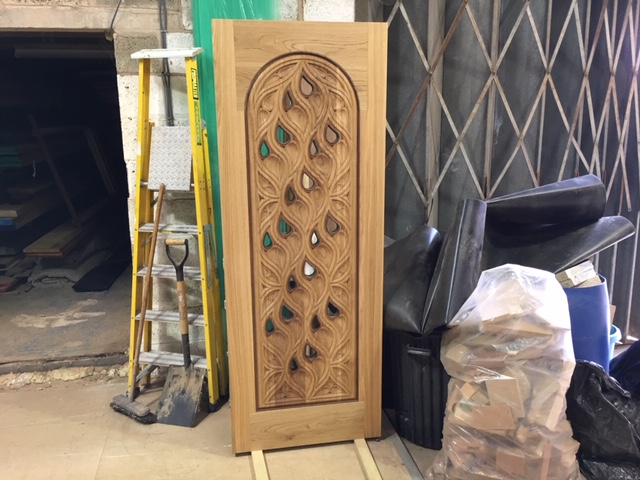
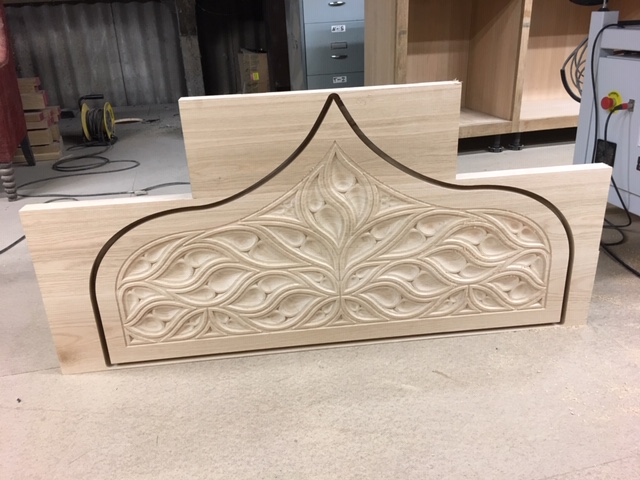
A major feature in the clients house is the door into the kitchen - I designed this in collaboration with Tom Philpott based loosely on a pattern of an old medieval gothic door panel that he found. I developed it into something that had a more contemporary feel but still kept the balance of symmetry with a natural flow through the panel. The customer also wanted some small panes of glass to go into the door so we selected some of the scalloped shapes to be cutout. The majority of the door frame was made by hand although I did cut the arched head which you can see in the first two pictures below. The next two images show the door being carved, these required two setups on the CNC per panel and each side of the door took 10 hours to carve. The fifth and sixth picture show the finished carved panel and the panels sandwiched into the frame.

To hold the glass in the cutouts I made 40 walnut beads. These were pretty tricky as they are only 6mm wide at the tops and the back has a 2mm step and then a 15mm deep wall that is only 4mm wide… Between them being generally tricky to cut and making a couple of errors in setup I ended up with well over 10 failures! In the last row of pictures you can see the process I used to make them, first cutting the pocket and wall from the back then inserting that into an MDF pocket to hold the part while cutting the rounded shape on the top. The final image shows them stacked after sanding.

To finish the door we are now waiting for the glass. I’m really looking forward to seeing it assembled, with the glass and beads in and everything oiled.

Door Frame and Window Headers

The frame for the door has a variation of the same “modern gothic” pattern cut into it. You can see in the first two pictures below they how the longer parts of the frame required three separate setups on my 900mm CNC bed. I’ve got a good, albeit time consuming method to get the wood perfectly lined up between cuts now. The third image shows the sides and top together ready for assembly. The second row of images below shows another variation of this design which I adapted to fit a pointed shaped header that will go above a window in the same room. I really like the way this pattern combines a certain geometry and flow with both sharp and rounded shapes and how you can adapt it to fit different applications.

Poppy Window Frame

The three images below show a “quick” job I did to carve some pieces for a painted window frame. I took the poppy motif that we’ve accented other items with in the house and carved that into the corners and middle of each side then added the fluted parts of the column so it could all be easily assembled and painted.

Beam Decoration Sample

Given the scope of the work in the clients home we end up making a number of samples to test things out and to fine tune designs and get feedback on what we’re doing. The sample shown in the image below, I made as an example of an ornate decoration we could add to the beams in the kitchen. This echoes the moulding profile and curved shape we’ll be using on the cabinet doors. To this I added a leaf with v-carved veins and a walnut inlay. Making this allowed the customer to see that this was more than he was looking for and we’ve pared this back now for the final version. I was still pleased with this combination though and particularly the interplay between the relief carving, v-shape and inlay. Often these things find a life on something else once you’ve made them.
Fist & Arm Newel Posts

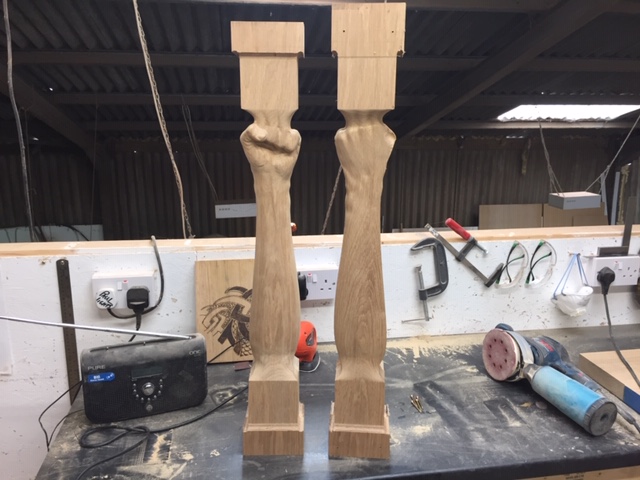
The final thing to catch up on in this blog update are two fist shaped newel posts that I created to fill gaps in the posts on the clients stairs. Due to the age of the house the posts on each floor do not line up naturally but the customer still wanted them connected. So I suggested picking a shape that would completely break up the straight lines and offer something very unique while still having the same rough outline as a traditional newel post. After the customer agreed to it I realised I probably should have kept quiet as it was going to be pretty tricky to do - although really its this kind of difficult and unusual job that is always most interesting to solve. In the end I found a model of a fist on the Turbosquid 3D model website, this was an excellent model - I assume made from a 3D scan of a real hand. I still needed to bring this into Vectric’s Aspire software though and build the forearm including some accents for muscles and tendons and blend this all together and make it fit the post. This took quite a bit of adjustment and to help I cut a half-sized model of an early version which was useful to make final changes.

Each post is around 600mm long and required a piece of oak 110mm square. I cut the parts from one side first then flip the material to cut the other side. The depth of the cut along with the fact I only have 150mm of clearance on my CNC made for a pretty interesting setup as you can see in the first 5 images below. The carving time was about 5 hours per arm. The sixth picture shows them finished and off the machine. Due to the fact the tool cannot get into the undercuts I knew there would be a fair amount of hand-carving to do to finish off the detail under the fingers and in the sides of the fists themselves. The last row of photos shows the hand-carving in progress and the two fists almost finished at the clients house so they could be fitted. I have still got some more hand-carving to do to complete these and the customer is also looking to have me tattoo them both to match the amazing tribal tattoos on his arm. So this particular challenge keeps getting more interesting by the day…