The things that should not be...

From time to time I'll hear a sentence that seems so unlikely that I feel like it must have been the only time its been said. The concept that something can be so absurd to not have existed before is a wonderful thought as it hints at the infinite possibilities of making something new albeit based on existing ingredients. This is especially enjoyable in a world where we can almost instantly check whether something does have "life" or at least if it's written somewhere on the internet.

Similarly I really enjoy the idea of creating objects or products that to the best of my knowledge don't exist and maybe some would argue shouldn't. Why is this good? At a basic level it might just be a silly play-on-words that makes me (and hopefully someone else) smile, nothing wrong with making people smile. More broadly though, beyond the joke it might help us see the absurdity of an existing idea or poke-fun at stereotypical branding. The combination of this with objects that it inspires me to create maybe make us look at them both in a different way. 

I call these type of products "The things that should not be" - although clearly even that is a play on words and not what I actually think - otherwise I wouldn't make them. These should be irreverent, borrow ideas, imagery, names and memes from different places and mash them together to provide some entertainment, provoke thought, confusion and in some cases offence - although that may be more about how easily someone takes offence...


Share

Greenhouse Window nears completion

As I was away last week and the last few days have almost entirely been spent cutting beads and templates for greenhouse window glass there is not too much to report. We have had some proper winter weather in the UK this week which means I can't even get to the workshop today...

One thing which was fantastic to return to after my week of home improvement was the fully assembled window frame. The guys at TPCM (Thomas Philpott Cabinet Makers) who I share the workshop with had been busy putting the 34 pieces together in the triangular frame as you can see in the images below. They told me that having all the pieces cut to size with the appropriate angles and joint-locations made it relatively simple to put together. This window frame has been a very interesting and challenging project but having now spent this week cutting the glass templates and beads I am ready to be finished with it and move on. If not for the snow today it would be done, I'd have taken photos to post and have made a Friday project, honest... Anyway, enough excuses - next week hopefully we'll have a lot more interesting things to look at, until then this is pretty cool...

Share

Greenhouse Window, Moulding Replication, Cherub Window Reborn and Squabble Letters...

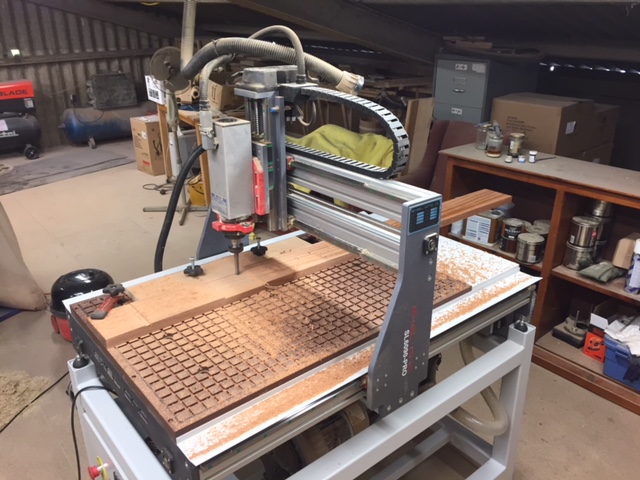
The majority of my time this week has been spent continuing to make window frame pieces for the large greenhouse the guys in the workshop are making. The first row of photos show the hub being cut, the last four outer pieces on the machine and the parts I've cut assembled on the floor. In total there are 34 pieces which now need to be finished and assembled - thankfully not by me. These parts have all been carved from 45mm thick Sapele, cut on both sides to create a 20mm deep rebate on the back and then the moulding shape cut on the top. All of this was done using simple 2D toolpaths either with a flat ended cutter (End Mill) or an Ovolo cutter for the moulding shape. Its been quite a marathon of organisation and toolpath creation. The week after next I'll be cutting beading and glass templates for the same window. 

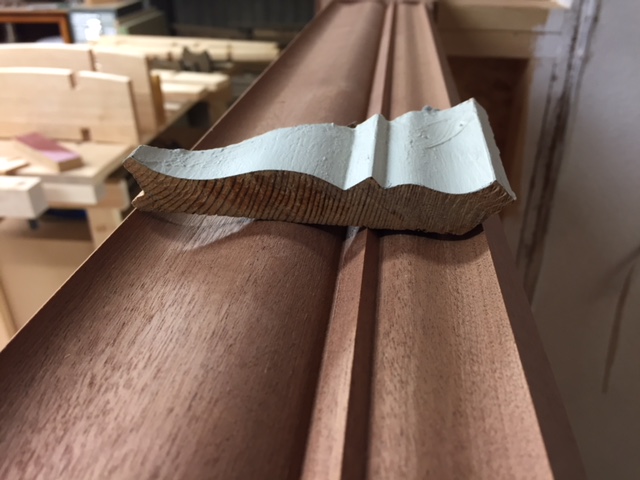
On Wednesday I had a break from cutting these to replicate a piece of old moulding for an installation the guys needed to finish. I took the sample they had and re-drew it in Vectric's Aspire software taking measurements from the original. I then cut this using a combination of 3D toolpaths for the curved sections with a 90 degree cutter for the angles and sharp corners. It looked really close to the original and when they installed it the guys said it was spot on. You can see one of the lengths being cut in the second row of image along with the finished section on the machine and a comparison with the sample pieces I was given to copy. 

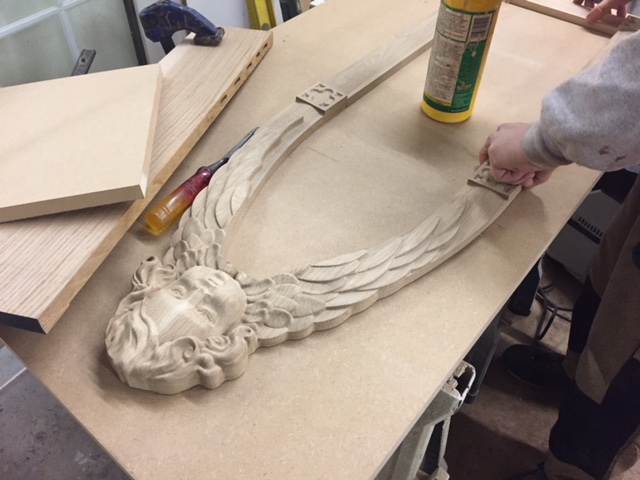
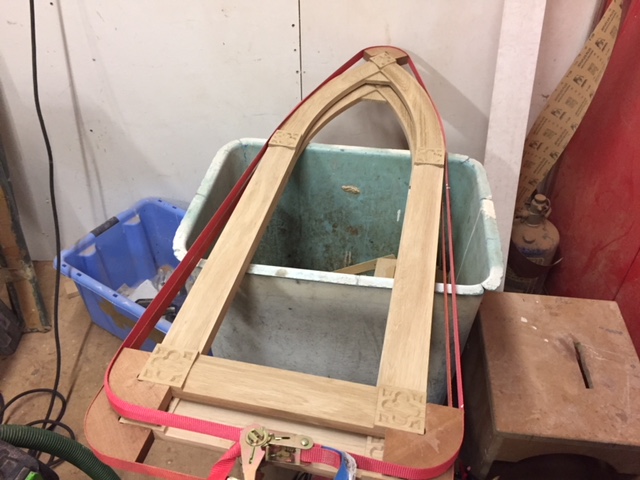
Something else that has progressed this week without my help is the Cherub window that I cut the parts for last year. Adam has been assembling these and building up the casement as you can see in the third row of images below. They'll hopefully be finished and installed in the next week or two.

For my Friday project this week I made something I call "Squabble" which you can see in the fourth row of photos. The idea with this is that if you had an argument with someone you could use this to unambiguously indicate whether you were ready to make up or not. Each letter is two sided and from one side it says "Love You" and from the other you can indicate that perhaps your still mad with them. Each letter was cut top and bottom and then the stand was made from two pieces cut separately and then glued together. As much as I made this mainly to entertain myself I was quite happy with how it all came out and how the letters handle and sit on the stand. The Friday projects so far have always proved to be a useful exercise and fun, which is what I'd hoped they would be. 

The last row of photos tie up some loose ends from old blog entries. I finally installed the sign for our cottage onto the wall to replace the old one. I oiled and glued the shelves I cut in my Friday project the other week, you may notice I decided to stain the bow-ties which makes them stand out nicely. The last photo shows how nice the wood for your fire basket can look when its off-cuts from a greenhouse window...

I'm not in the workshop next week so they'll be nothing new for a couple of weeks now.  

Share

Fluted Columns and Greenhouse Window Frame

Igor (the CNC machine) has been pretty busy this week making parts for Thomas Philpott Cabinet Makers - the company who I rent workshop space from. Monday and Tuesday were spent making the parts to construct two fluted columns for a window surround they are making. Then on Wednesday I started work on a very ornate greenhouse window, that should keep me busy most of next week as well. 

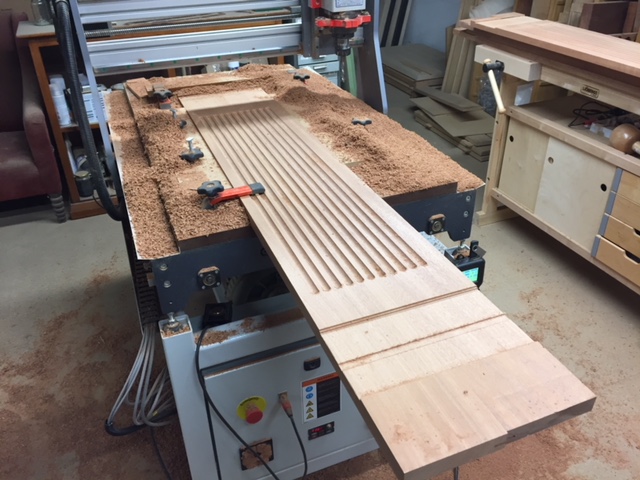
The fluted columns were relatively simple but included some interesting logistical challenges. Each column is 2.65 metres long (almost 9 feet) and includes the fluted sections along with some decorative pyramid shapes. My CNC can only cut a 900mm (3 feet) length at one time, so I knew I'd have to do multiple setups to cut the long pieces, so I figured i'd start with the easy pyramid shapes and get the machine running. These were just modeled in Vectric's Aspire software and then I created 3D toolpaths to carve the angular shapes and pocketed around them to leave a small vertical edge. These were cut to size so they could be inserted into locations I would cut into the longer sections. They were pretty quick to cut (in poplar) and while they were machining I started working on the setup for the long parts. I decided to make each of these in two pieces; top and bottom. Each one needed three setups to carve the bottom pocket, top pocket and then the flutes. This took a bit of working out but once I'd got the process down it was fairly easy, you just need to carefully measure when you position them. In this case I did not use the tiling feature in the software but just manually moved the drawing in between each toolpath as they were arbitrary distances. In total there were 8 fluted pieces, so 24 setups, these were all carved in sapele. In the second row of photos you can see these having been assembled and primed. They'll be painted on-site to match the other furniture in that room. Jobs like this are interesting because they could be done using traditional tools but as one of the guys in the shop commented - "...they would have been a bastard to do by hand." On the CNC, although I had to work around the multiple setups once you've thought through the process then cutting the parts is quick and easy and each one turned out perfectly and were apparently easy to put together. 

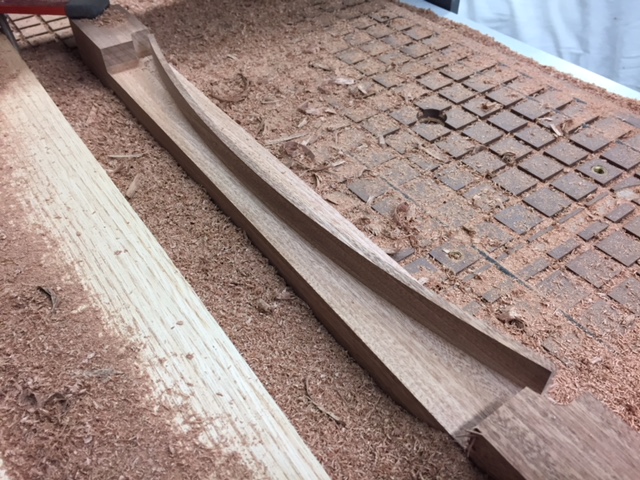
The greenhouse window is a different and significantly more complex challenge. You can see in the image the drawing of what the finished window will look like. Its approx. 3.2 metres wide (10.5 feet) and 2.4 metres high (7.8 feet) so pretty big, I've been asked to create all the curved pieces for the internal frame. Each of these has to be rebated to accept glass on one side and have a moulding shape cut into the other to match the rest of the greenhouse. Last week I made a prototype to test the process of how to make these which worked well. This week I've started to put that into production. Each part is cut from the rebate side first, pocketing out the material to leave the ridge proud. These are 20mm deep out of the 45mm thickness of the material (sapele). To cut the moulding side I machined grooves into a sheet of MDF, these grooves were designed so that would let me insert the ridge on the rebated side. By doing this I could ensure when I cut the moulding shape they would line up perfectly. The moulding shape was done in 3 toolpaths, a 1/2 inch profile to clear out a small ridge, an Ovolo shaped tool to create the bead and top ridge and then finally a 1/4 inch tool to cut them out. Each part has its own profile which should allow them to be more easily assembled. You can see the process in the images below. I was able to make 15 pieces of the frame this week and will get the other 19 pieces hopefully all cut by the middle of next week. It'll be very interesting to see how it all comes together once they are complete...

I did not have time for a quick Friday project this week but plan to head into the workshop tomorrow to make something fun. 

Share

A Big Window, Gothic Samples and Shelves

Just a partial week in the workshop this week but I still managed to create quite a variety of things.

The part shown in the first three images below is a proof of concept for how we're going to make the individual pieces to assemble a very large, ornate frame to go into a triangular window on a big greenhouse (you can see the window in image 4). This part was cut by machining the rebate first on the back, then cutting a groove to slot the rebate into in some MDF, this allowed me to align the top side and cut the moulding shape into it. Now I know it works I have to cut about 30 parts like this that all need to slot together to make the complete window... 

The fifth picture shows the finished house signs I've been working on for the last week or two, they'll be collected tomorrow. The sixth image shows some concave handles I cut into a chopping board the other guys in the workshop made as a gift. I would not normally post something like this but was really happy with the way the shape cut through the different coloured woods. 

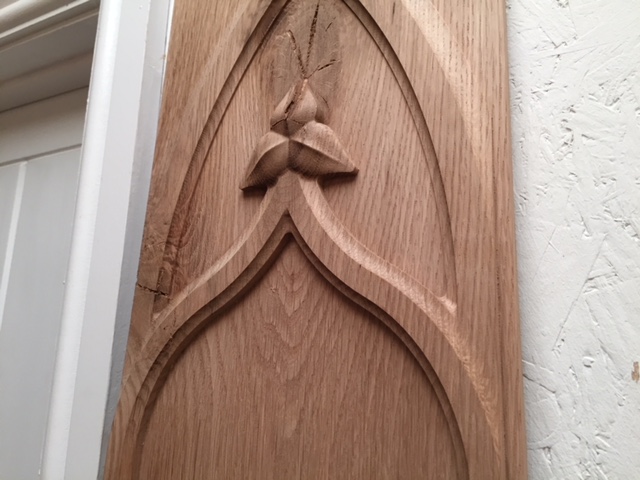
The next two rows of pictures are samples we made for a customer who wants to create a very ornate Gothic themed kitchen. The quatrefoil was fairly standard but Tom (who I share the workshop with) suggested we make the inside shape concave. I was not sure how this would look but the finished effect was excellent and added a slightly modern twist to an old design. The arch panel shown will be the base for all the doors in the kitchen although the finished one may be even deeper. The poppy is a motif the customer would like us to include in various places in the layout and finally with these samples the diamond pattern post was an exercise to see what texture we could cut with a point-roudover tool. This was cut on one side of a 60mm post then rotated to repeat the same toolpath again. Now we'll see if the customers likes all these and if so then that will mean a lot of work for the CNC (and me)... 

The last three rows of pictures show this week's Friday morning project. These were inspired by the family needing a small set of shelves to go into a disused fireplace. I was going to do a simple rectangular set of slot together boards. Although part of the Friday challenge is not to do things the quickest or easiest way and once I start messing with something it tends to take on a life of its own anyway. As you can see from the final design, these are anything but rectangular. The shelves are all curved, they have a pocket cut into the back along with the special fillets in the corners to allow the joints to fit squarely with the uprights. Each of the vertical panels is made from two pieces that slot into the shelves with a deliberate offset gap in between curving up through piece. Finally I added a bowtie shaped pocket between the front and back to pull the parts together and create a decorative element with the grain going horizontally. It took longer than intended to create this (as I originally envisaged something much simpler) but from sitting down at the PC to finished part was about 4 1/2 hours, which given how nice it looks I thought was entirely reasonable. A genuinely pleasing part of the process is how well all the pieces slotted together with minimal effort, the bowties ensured that the spacing and joints were all pulled tight - although it was already pretty close. As shown in the images this is not glued - just gently knocked together and it is completely solid. I will probably pull it apart to finish and then use some glue but it does not really need it. The parts were all cut from the 24mm chestnut boards I've been using for my R&D projects for the last few weeks. Its not the cleanest wood with a number of colour imperfections but for me that just adds to it. It was all cut with a 1/4 inch end-mill tool, 2D pockets and profiles. 

Having brought it home, it got thumbs up from everyone whose seen it, which is always the ultimate seal of approval. 

Share

Signs, Oil and Twisted Ovals

It's been a useful four days in the workshop this week. I'd did some preliminary work for future projects which should start to appear here next week. There is a real variety of size and complexity and some unusual items in the works..

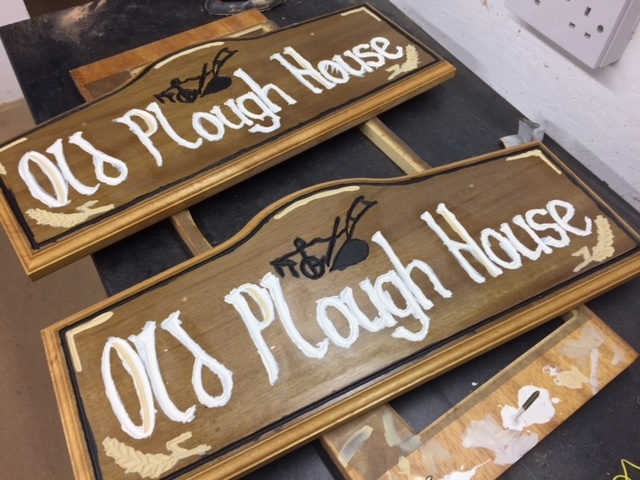
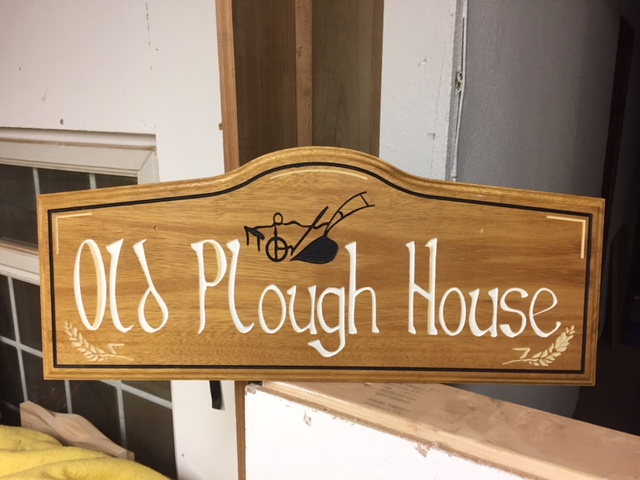
This week I worked on some pretty straight forward jobs. A friend asked me to create two copies of an old weather-worn house sign he had on his property - Old Plough House. Its condition and the fact it was probably hand painted meant that I had to scan it in several setups and then draw vectors over those sections and re-assemble the design to replicate its original size, shape and look. This done, I found a couple of Iroko boards in the "scrap" pile of the workshop. Based on the pencil markings on them I think they were offcuts from stair-stringers. I gave them several coats of sealer, put sign-makers masking film on them and did the carving. I went for a flat bottom carve for the text and images but this did not machine the film very well and in future I'd go for full depth v-carving instead to try and reduce the additional clean-up that entailed. Carving complete then it was on with some more seal, then paint and finally pulling the paint mask off. These stages were done over the course of the week to allow drying time. You can see the progress below. There is a bit of touching up to do, some sanding and then applying oil to finish. They have come out very close to the original apart from looking a lot newer. 

Another quick sign job I did was the Orchard Close sign (image below) - this went from request, through design and cutting the finished part in an hour! In amongst the other jobs the tool coffin from last week and the latest batch of six CeorfanBirds were finish sanded and oiled. 

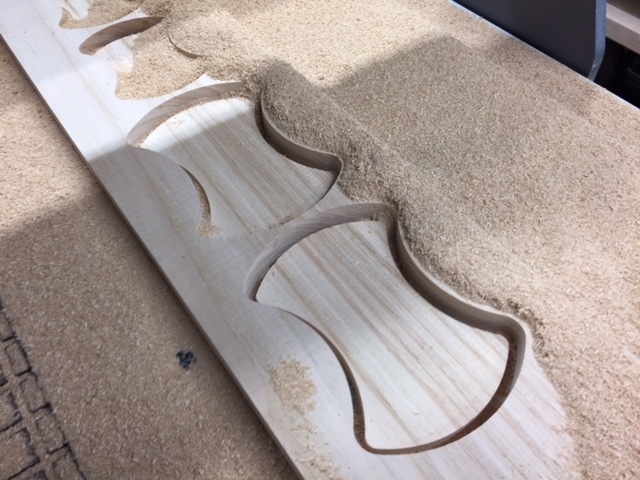
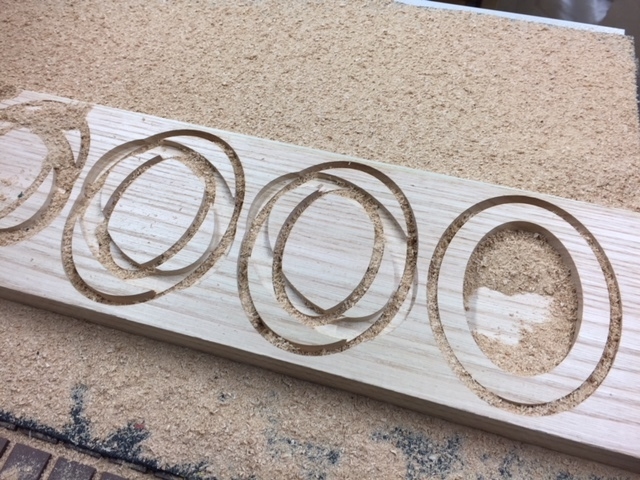
As I'm not the workshop tomorrow, my Friday morning project became Thursday evening. This week I set myself the challenge to make a pencil holder with a difference. The design utilises oval shapes that slot together the slot is the same shape as the oval but rotated slightly. When they are put together this gives a really pleasing effect of the shape twisting. It was actually fairly quick to layout (including head-scratching time) and then took about 1/2 hour to cut. I used the same Chestnut I used for the tool coffin last week as I've a stack of it to play with. With a little sanding to clear off some minor tear-out, the pieces slotted together very snugly (0.1 mm allowance). You can see in the images the ovals being cut and then the finished result with it slotted together. The result is a really pleasing shape. 

I've also spent a lot of time this week continuing to plan the future of the business and understand it's mission which is starting to get more clarity. Although it needs more distillation to make sure its 100% focused. Nice to feel some sense of direction though. 

Share

Planning, A Book, Signs and a Tool Coffin

I'm very happy to have actually made it into the workshop this week even though it was only for the last two days. On the plus side I've dealt with all other distractions so will now be working on a full weekly schedule from Monday. I've also taken the chance this week to do some much needed planning. Right up to the end of last year I was not sure if CeorfanWorks would be a pastime that I tried to get to generate some income or a full-time, full-effort endeavour to build something more than that. A great deal of reflection has led me to realise I am really passionate about doing something special with showing how digital technology can be used to make interesting, useful and beautiful wooden objects. As such it's all systems go. I'm still working on the details at the moment for how the business will evolve once I've got it straight in my own head. I do have a good idea what I'm going to be working on for the next couple of months though which should create more interesting and more regular things to look at here. 

I read a book this week called "Why we make things and why it matters." by Peter Korn - a Christmas gift from my niece - this was serendipitous timing with regard to thinking about the direction of CeorfanWorks. The crux of the book, as I read it was about the authors quest to understand what motivated him to make fine furniture and the mental, physical and in some ways spiritual benefits of being a craftsmen. There was a lot that resonated with me about what I want to do and how I feel about making things. It definitely didn't make me feel less motivated to take it somewhat more seriously than I have been...

Thursday was spent doing some jobs round the workshop to improve storage and location of tools, finishing my immediate planning and checking how level the CNC machine was. I also drew up a job that I'll be cutting next week and sent it to the customer for approval. Tom who I share the workshop with asked me to make him a quick sign for something he's doing. The first one chipped out a bit so I cut a second one with better spacing and slightly less depth on the letters, these can be seen for comparison in the first picture below. 

On Friday's this year I'm going to set myself a project each week that will be started and finished within a few hours. The idea is this will allow me to work on something for fun each week and give me the gratification of completing something quickly when I'm working on long-term jobs, it may also work as R&D for possible products and production methods.

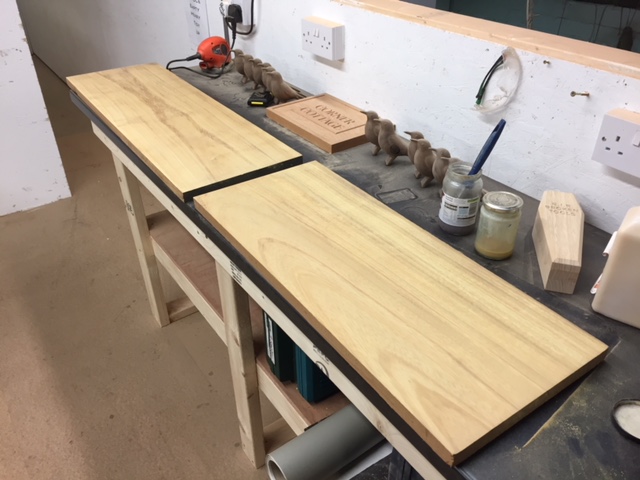
This week for my Friday AM project, I decided to build a small coffin for the tools I break in the workshop. I already keep these in a small plastic box with RIP written on the top as a reminder to myself to try and avoid doing it in future... The box is not very attractive though and I thought it would be entertaining to build them a proper coffin so they can really rest in pieces. We'd recently acquired some chestnut in the workshop which apparently is known as poor mans oak as it looks similar but is not as dense. 

I wanted the box to be as correctly proportioned as possible so I looked up coffin dimensions on a website that encourages you to build your own! I decided to go for making it in three pieces. The bottom two slotting together to make the box, for the top I decided to cut it from both sides so I could create a lip for it to sit into on the main body and also carve a bevel and some text onto it. You can see the results in the images below. The chestnut cut really quite nicely and everything fitted together well. I glued the two pieces that make up the main box and did minimal sanding to get it to the state you can see in the last image. I'll apply some oil next week to finish it and then hopefully won't provide too many broken tools to go into it...

Share

Planning and Christmas Gifts

It's been a lazy period over the last month with the holidays and some renovation projects which needed more attention than I spent on activity in the workshop. Thankfully this is all pretty much finished and so starting on Monday I'll be in the workshop full-time really for the first time since I started this project. That should mean a lot more productivity and focus - if pull my finger out it may even result in regular updates to the website...

As well as the normal Christmas period activities I have spent a lot of time thinking about what I want CeorfanWorks to be and started to do some more formal planning so I can create a path to follow and try and stick to it. The planning stage is always exciting as the potential is endless and the hurdles often small or invisible, it does not help much with my sleep though as my brain races thinking about ideas and directions to follow... I should have this nailed down in the next couple of weeks though and aim to document the plans as fully as possible on the website.

I was able to make a few things before Christmas which are shown below. Several people ordered a magnetic beer cap catcher - you can see in the first image the masking film having been carved through ready for painting - this mask worked really well and edges of the letters were perfect. The middle top picture is the ruler I made for my niece around October which is now installed on their wall and being used as a child measuring device. Its not the best picture but looks good on the wall as satisfying as an oversized wooden object. The third image is a family of CeorfanBirds that Tom who I share the workshop with ordered from me. These are the only two baby birds I plan to make so are a special 'family' group. 

The second row of photos all show the present I was making that I alluded to in my last journal entry. These were for a pair of bookends for one of Tom's (the cabinet maker I share a space with) clients. They are based on a design for a stone gate drawn by the well known 16th/17th century British architect Inigo Jones. I took his design and based on that created the drawings using Vectric's Aspire software, I then used these to create the 3D models. The columns, doors, main part, tops and bases were all cut in separate pieces from oak using a very fine tapered tool. The machining time and cleanup on these very fine parts was quite lengthy but the finished pieces are quite striking and the multi-component assembly is very effective. The last photo shows then finished and in pride of place on the clients mantel.

Share