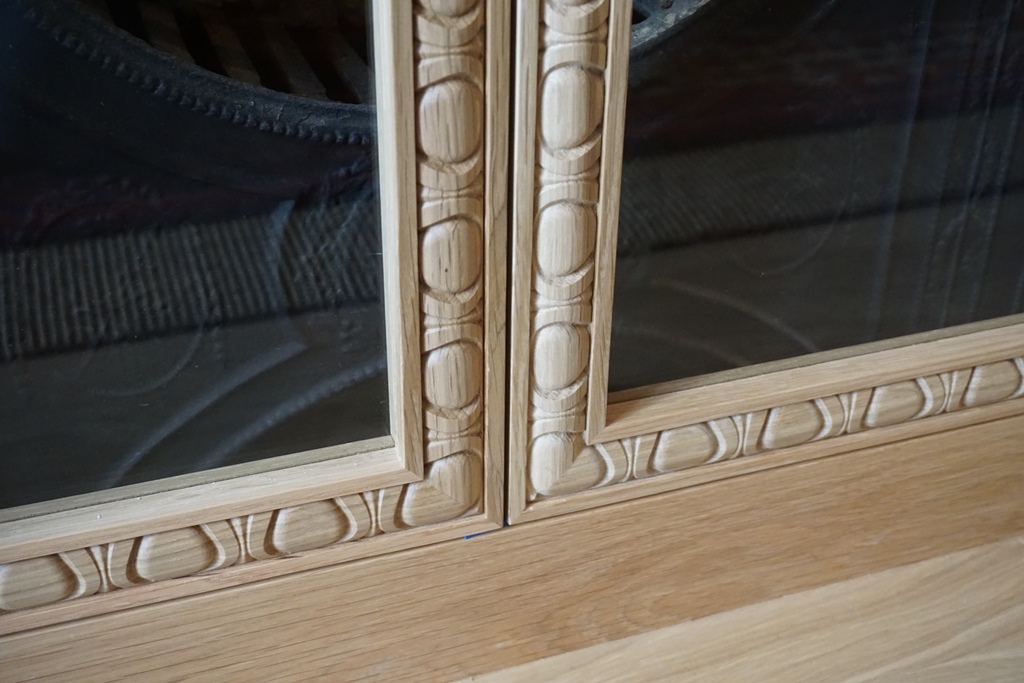
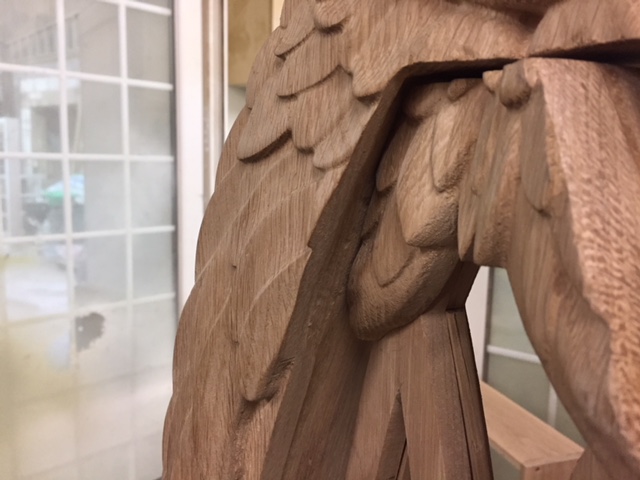
The six photos below show some of the stages involved in making this two part sign to celebrate Vectric winning the Queen's Award in 2017. The "e" was cut as a two-sided model. The main board was v-carved, then painted and sanded back to leave the white letters. The "e" was screwed from the back and glued to the main board and everthing was laquered to finish.
Abe Lincoln Death Mask - Build Photos
Below you can see a gallery of 12 pictures that document some of the steps involved in machining and constructing the replica of Abraham Lincoln's Death Mask I made. The process for this involved downloading the 3D file from the Smithsonian Museum's 3D data archive this was imported in Vectric's Aspire software from 3 different angles and sliced to make the individual components for CNC carving. The pieces were cut out of 40mm thick oak butcher block kitchen work top material. The slices were glued and then I hand finished the edges to blend the parts together and added some detail by hand before sanding and oiling the finished piece. This is a life-size replica of the original death mask.
Floral Carvings, Twisted Avocados, Caravaggio and the World Cup
A nice eclectic mix of work going on in the studio this week. The first image below shows the finished door panel that I was working on last week, this was installed Wednesday and the customer was very happy. The same customer has also requested a frame to be made for a stained glass window he has. The window has a poppy motif, so I designed a straight section of the frame with poppy flowers and leaves. I cut the sample you can see in the second and third photo for the customer to approve and I'll be carving the frame when we get the actual glass for sizing.
I cut another bowl design I've been thinking about on Tuesday. This twisted avocado shape has a sloped base so the dish sits on an angle. I cut this in some scrap 60 mm thick Ash and was really pleased with the way it looks and its tactility. You can see the progress of this in the second row of images. I'll definitely be exploring this design further.
The third row of photos show something I have been working on for a while in the software. Its for an art project I'm creating which will examine elements of belief. This particular model is based on Caravaggio's painting "The Incredulity of St. Thomas". As you can see its a small detail of the whole painting. I cut this maquette to check the model so it can be adjusted, scaled up and cut from separate pieces for the final version. I'm very pleased with how this carved especially as its less than half of the planned size, I also liked the effect of how it sits in the frame with the voids cut out around it.
The last row of photos are a few unconnected items. The first image is a prototype I cut for a design student from an imported 3D model. The second is a sign for one of the guys in the workshop. The last image is the continued work in progress of the almost double size World Cup trophy I've been slowly hand-carving after initially roughing it out on the CNC. Its starting to look much better but there is still definitely more to do on it...
Door Panels, Cherub Window Installed and Greenhouse Built
This week I mostly worked on four decorative door panels along with doing some design and modelling for future projects. In addition some older projects have been finished and installed and I was able to take photos. You can see these along with the door panels below. I also worked on hand-carving on my giant World Cup trophy (which may or may not be finished before the World Cup tournament)...
The decorative panels are for the back of an entry door. The customer has patterned tiles in the hall where the door will be installed that he wanted me to use as a basis for the design. In the first row of photos you can see the resulting panels I modelled being cut and then in the third photo the panels in the part-finished door.
The Cherub Window that I carved last year has been installed this week, in the second row of pictures you can see it from the front showing how the window pivots in the middle and then in the 3rd picture on the second row you can see the back of it in the customers library room. The guys at Thomas Philpott Cabinet Makers did a great job with the assembly, the mechanism for the pivot and the install.
In the third row of photos the first picture shows the window frame I cut the parts for the other week which is in the same customers library room.
Finally the last two images show the greenhouse I was working on earlier in the year and close up of the window I specifically cut - this is now fully assembled and awaiting the glass which should be fitted soon... very cool indeed.
New Shop, post pockets, prototypes, old stuff and something big...
It's been a mixed couple of weeks with some time in the workshop and also time spent tinkering with this website. I'm please to report that the latter has resulted in better organisation for my online Portfolio and also the first stage of an Online Store. Next stage is to develop more things to sell and think about how to get people to find the shop and want to buy things... not easy to solve but good problems to have.
In the workshop I continued to cut parts for the Gothic Kitchen. The majority of time was spent cutting pockets into 12 oak posts. These pockets will have the walnut pyramids and quilted panels I've cut previously inlayed into them. While the machining of these pockets was easy, the setup was very time consuming. I had to do 3 operations for each post, moving them in-between each setup to their new position. While adjusting them I had to ensure accuracy, keeping them straight and indexing so the tool was the right distance after each cut to ensure even spacing. This worked well and they are all now complete. In photos 1 and 2 below you can see a post on the CNC and the pile of posts part way through cutting.
The 3rd image below shows a prototype for the door for the kitchen. This carving will be repeated across the whole panel and should look amazing with its contrast of sharp corners and concave curves. I'll hopefully get to that soon, next week I'll be re-engineering the cabinet door panels to get them ready to cut all the components and making some more small components for inlay.
The second row of photos below shows things I've made in the past few months actually in use. The first is the magnetic key holder which is proving to be very handy at home. The second and third show items made for our Holiday Cottage, including the shelves I made to fit an awkward space with a CeorfanBird and bowl on display.
The last row of photos is something I've been working on this week for my Friday (and Saturday). At this stage you'll either recognise it or not from the photos so I'll not reveal anymore until its glued and finished next week. It will be larger than life though that I can promise...
Carved Mantel Gallery
This oak mantelpiece was made in collaboration with Thomas Philpott Cabinet Makers. The brief was to create a design which was a replica of an existing 17th century mantel that the client already has in their house (shown in second photo - painted white). To make the project the original was extensively photographed and then computer models of all the carvings were created using the photographs for reference. The models were adjusted in size to allow the mantel to fit into the available space before carving on the CNC machine ready for finish and assembly. The installed dimensions of the mantel are: 1405mm x 1250mm x 250mm.
In the first block of images below you can see completed pictures of the mantel. In the second block are images of some of the build process.
Finished Installed Mantel
Build Photos
Walnut Leaf Clusters, Frames and Key Holders
Work continued on the many parts needed for the Gothic Kitchen this week. I made 30 Walnut 3-leaf clusters which will go on the door panels, you can see these being made in the first three pictures below. I also made a shaped sanding block to help sanding the quilted panels. You can see this in pictures 4 and 5 below. The guys in the workshop have also glued up the wood for the 10 oak posts in the kitchen. So I'll start the process of pocketing those next week so we can glue in the quilted panels and pyramids - they are 2 metres long so will be a good challenge.
The last picture on the second row below is one of two ceiling-window frames which are going in the library that the guys worked on last year. I cut quatrefoils and chamfered pockets in this to match the decoration in the rest of the room. I also cut the pocketed section in the side which will hold the blind.
Finally as a one-day project I made a prototype for a magnetic key-holder. This maple block has magnets in the back much like the beer cap catchers I make. The idea is you fix it to the wall and then can just "stick" your keys to it when you come in and pick them off when you go out. It also looks nice as a piece of wall art with the smooth ripple carved into the front. I maxxed out on the magnets so this one works particularly well... I'll aim to finish it on the weekend and put it up so I can photograph it in action.
Quilted Panels, Pyramids, Old Projects and Nonagon Bowls
The start of this week saw me in production mode with the Gothic Kitchen. I started by cutting the quilted panels that will inlay into all the vertical posts in the kitchen. These are carved in walnut wood using a pointed round-over tool, making simple 2D straight line passes. As I needed to cut 30 of them I spent quite a bit of time perfecting speeds, feeds and cutting direction to get the cleanest finished part I could (you can see a close up in picture 1 below). To minimise material waste I made my own wooden stepped piece to help clamp the ends of the boards (picture 2). The other parts I've been cutting for the kitchen are some small square shallow pyramids that you can see in picture 3 - these will also inlay into the posts.
A couple of projects I worked on a long time ago were picked up by the guys I share the workshop with this week for the final finishing work. In picture 4 you can see the frame I designed and made with the vinyl disks placed within it. You can see where I got the reference for the eye that is carved in them now from the image on the disks. This is 95% done and just needs some felt to cushion the disk and then final assembly. In pictures 5 and 6 you can see the Cherub window frame I carved at the end of last year. Adam did a brilliant job with making the window so it will be able to be rotated about its centre as you can see in the image as well as making sure the carving lined up with the outer frame... This was quite a challenge due to the thickness of the carving. This is being stained this afternoon and I'm hopeful it should be installed next week.
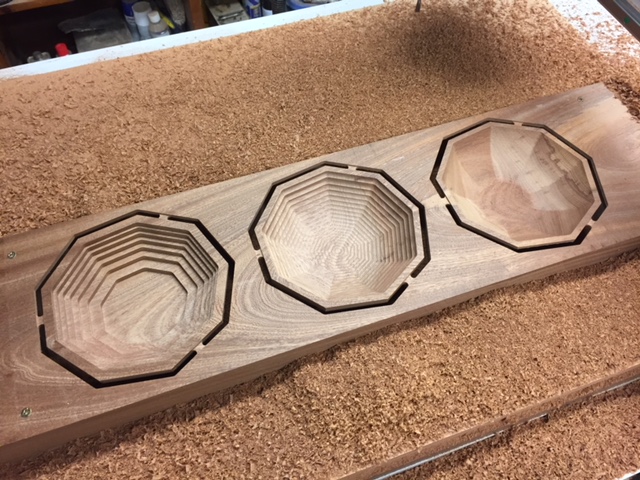
Lastly I continued my bowl experiments using a scrap block of Sapele I had left over from the greenhouse window frame parts. I wanted to look at the affect of using different types of cut on the same shape. So I created a basic nonagon shaped bowl on the computer and then carved one with a straight tool as a stepped finish, one with a round tool doing the same and then finally a "normal" smooth version with a typical finish pass. In the last row of pictures you can see the result of these. They are all appealing and interesting in different ways and all present different challenges with sanding and finishing. I think my favourite is the one with the round-tool stepping which is in the middle of the three shown in the images below. I'll probably now cut some more variations based on this idea adjusting spacing, tool size etc.
Next week hopefully I;ll be continuing work on parts for the Gothic Kitchen and hopefully have time to fit in some more bowl experiments. I'm also starting the computer work for a piece of art examining the idea of belief. That will be a number of weeks work to complete though...


